

One of the worst parts about tile floors is finding cracks in them. Cracked tiles are annoying. They look bad, and they can drive some people crazy. The problem is tiles do not simply come out. Seeing a cracked tile in the middle of a room might make you think that the tile is simply going to be stuck there forever. The good news is, despite being seemingly cemented to the floor, broken tiles can be fixed without contacting a professional.
With a little elbow grease, around $100, and a day to spare, you can swap out any broken tile for a fresh one. Here is how to replace a broken floor tile in nine easy steps.

| Time | 1 day |
| Difficulty | Intermediate |
| Cost | >$125 |
Preparation
Before you embark on your project, take a note of where your broken tile is. It is important to pay attention to nearby features such as carpet, other tiles, and transitions. You are also going to want to see where the damage to the tile is located and what kind of damage it is. The most common kind of tile damage is a crack, but you could also have scratches, gouges, and chips.
After taking an account of the tile and the surrounding area, you will need to gather your supplies.
You will need:
- Cold chisel
- Hammer
- Grout knife
- Trowel
- Fresh thinset mortar
- New grout
- Replacement tile
- Gloves
- Cloth
- Grout color
- Exact tile dimensions (to 1/16th of an inch)
- Nearby tiles
If everything goes according to plan, the job should take a few hours of actual work and then let it sit overnight to dry and cure.
Also, make sure to double-check the exact measurement of the tile you are trying to replace. This is important. Tile sizes change all of the time. Do not assume that a similar-looking tile has the same measurements as the old tile. If you cannot find a replacement tile that fits the one you are about to dig up, you won’t be able to apply an accurate fix. If you cannot find a matching tile, it might be best to live with the cracked tile until an alternative plan can be formulated.
The 9 Steps To Replace Broken Floor Tiles
1. Cut grout from around the tile.
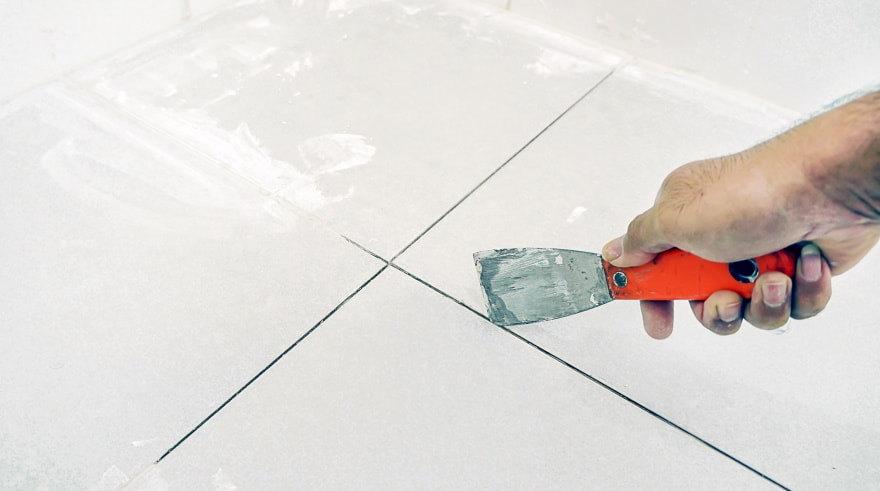
The first step to removing a broken tile is to cut the old grout. Using a grout knife or grout saw, cut through the old grout. Go around the entire border of the offending tile and pull out all of the old grout and throw it away. Make sure to get as much of the old grout as you can before moving on to the next step.
2. Break the tile with a chisel.
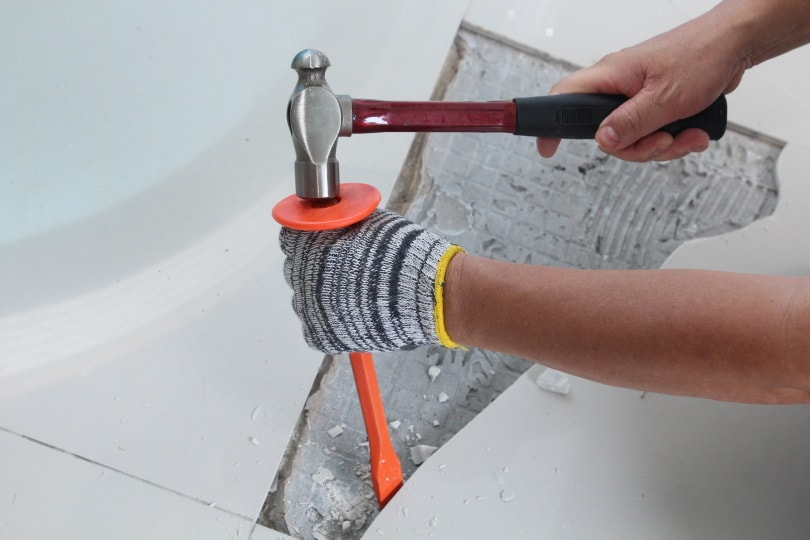
This is one of the hardest steps of the whole process. The goal is to break the tile into a couple of large pieces that allow you to get underneath and pry the tile up. You do not want to shatter the tile. You also do not want to strike the tile in a way that could crack nearby tiles. Breaking surrounding tiles is the number one mistake that can happen during this job.
Before breaking up the tile, put your gloves on. Broken tile and tile edges can be extremely sharp. Not wearing gloves or working quickly can result in painful cuts.
Carefully put the tip of the cold chisel into the crack. Widen it as much as possible by rotating the tip if you can. Then strike the chisel once, head-on, with the hammer, so the tip gets wedged into the crack. Do not continue to strike. You want the tip to get to the subfloor under the tile so you can get leverage and pry the tile out.

3. Pry up the broken tile.
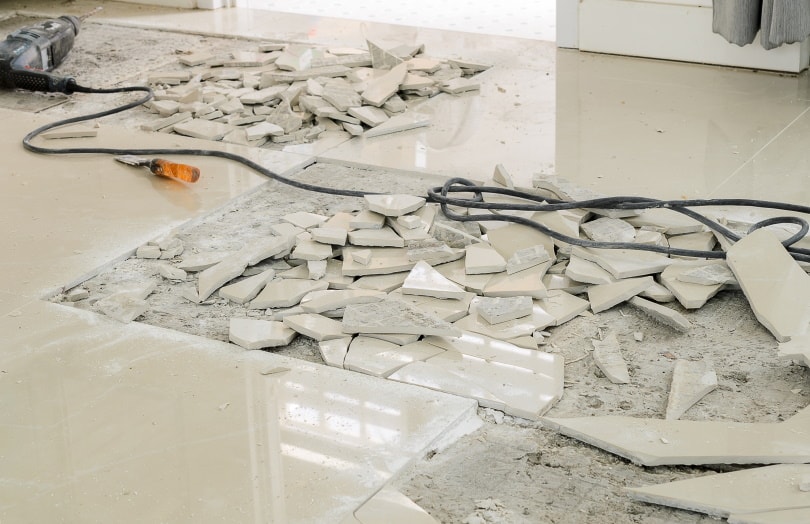
Once you get the leverage you need, pry up the tile pieces. The fewer pieces, the better. Ideally, the strike will have created just two or three chunks that need prying. Angle the chisel and put your weight into it, so your action is pushing the tile up from underneath it. The tile should come loose and then come free.
Discard the broken pieces. Be careful to avoid cutting yourself on any shards or edges.
4. Remove old thinset.
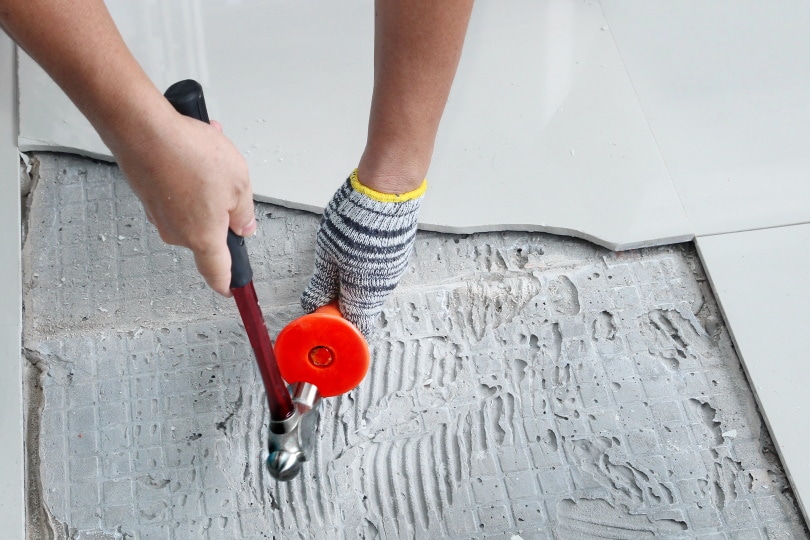
Once the tile is gone, you will see a rough underside. This is the old mortar. Before replacing the tile, you will need to remove the old mortar as best as possible. Using the hammer and chisel, break up the old mortar. Again, be extremely careful not to break any surrounding tile.
5. Clean the area under the tile.

After the old mortar is broken up and removed, it is time to clean the floor under the old tile. Using your cloth and some water, scrub the area. This will remove any dust, old adhesive, and dirt that might have been trapped under the tile. A clean surface will allow the new adhesive and grout to bond as effectively as possible. Putting new mortar over old mortar or dirt will decrease its ability to cure properly.
6. Apply new thinset/adhesive.

The most common type of tile adhesive is thinset mortar, but there are alternatives if you are more familiar with a different product. Mix the thinset to the specifications on the package using water. A good consistency is usually a little looser than peanut butter.
Spread the mortar over the space with the trawl. Be sure to evenly coat the floor and fill the space completely. Do not lather the mortar on too thick. You just want a thin layer to bind the tile to the floor. Too much mortar will cause the tile to sit higher than the tiles around it and can cause the mortar to ooze into the gaps between the tiles, which will hamper your fresh grout.
7. Set the new tile.
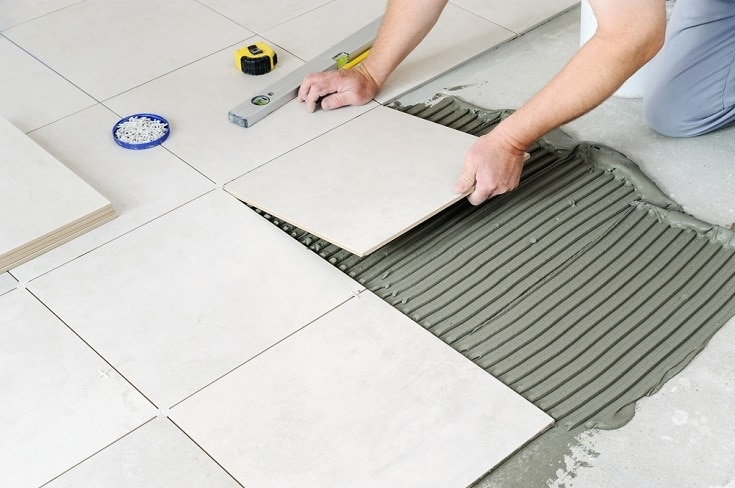
Once the mortar is down, it is time to set the new tile. Get your replacement tile and gently lay it into the space. Be sure that the tile fits, matches the direction of the other tiles. If the tile is too big or does not fit properly, do not try and jam it into place. Forcing a tile can break nearby tiles.
Once the tile looks good, and in the position, you want it, gently press down on it. Watch for any signs of the mortar coming up through the space around the tile. If there is mortar coming up, clean it up and clean the tile.
8. Grout the new tile.

Once the tile is in, let it sit for a few hours. Next, mix your fresh grout. If you are doing just one tile, you can push the grout into the gap with your finger. Go around the entire border with the fresh grout being sure to evenly coat all of the gaps. Smooth out with the trawl or your fingers until you are satisfied.
9. Clean and let it dry.
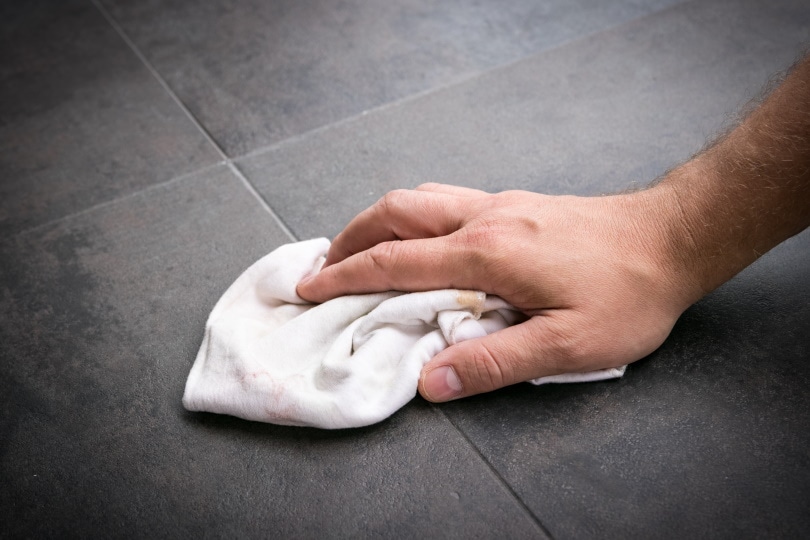
Lastly, you want to clean up the area. Clean the tile. Clean up any grout, mortar, or dust that might be around the area from the job. Then you want to let the tile dry and cure. For the next 12 to 24 hours, let the tile sit. Do not walk on it. Do not move anything over it. The mortar and the grout need time to cure and set so that it becomes permanent.
After the tile dries, it will be as good as new.

What if I Break More Tiles?
As mentioned, breaking nearby tiles during the course of the repair is the most common issue that homeowners run into while doing this job. Tiles are very vulnerable to cracking when their edges are exposed. If you do break surrounding tiles, you have two options. First, you can simply replace the other broken tiles at the same time. But if you do not identify why or how you are breaking adjacent tiles while replacing them, you run the risk of having a cascading tile cracking incident. The second option is to call in a contractor to repair the area for you. There is no shame in tapping out if the job gets out of hand.
The good news is many of these materials come in packs that make replacing multiple tiles affordable. Mortar, grout, and tile all come in packages that will let you repair more than one tile if you so choose. A small bag of mortar, grout, and a box of tiles should easily get you three or more tiles without a problem.
Conclusion
Now you have the ability to locate and swap out any cracked or damaged tile in your home. No more agonizing over what to do about an unsightly break in a uniform tile floor. This process can be repeated and done for any broken tile in your house as long as you can find a replacement that matches.
Featured Image Credit: Independence_Project, Shutterstock
Contents
