

Grommet pliers (or eyelet pliers) are a simple but versatile tool to help you put the perfect finishing touches on craft projects. All it takes is a squeeze of the hand to add a rigid and long-lasting reinforcement for securing all kinds of items, from birthday banners and handmade belts to shower curtains and tents.
A set of grommet pliers are a handy tool for classing up decorations and DIY projects around the house. The results are clean and professional, but it can seem a little daunting to try it yourself. We’ll show you how easy it is to use grommet pliers with these essential tips and tricks.

How To Use Grommet Pliers
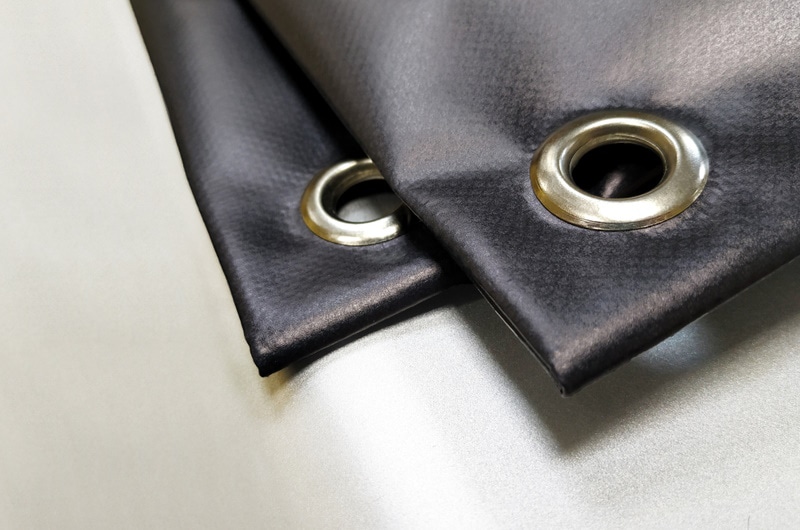
Before using grommet pliers, it’s crucial to understand the difference between grommets and eyelets. Though the two are similar, an eyelet is one piece. A grommet is two pieces: a grommet and a flat washer. An eyelet and a grommet have flat faces with protruding barrels.
You can often use the same tool to install eyelets and grommets, but the added washer that comes with a grommet provides a firmer hold and cleaner look on the backside.
A grommet is ideal when you need a sturdy hold, such as with a shower curtain hole, while a single-piece eyelet is more convenient for smaller crafts and sewing projects. Both come in several sizes, and although you may be able to use one tool to set both grommets and eyelets, it has to be the correct size. Fortunately, many pliers allow you to swap out parts to fit several grommet sizes.

The 4 Tips & Tricks on How To Use Grommet Pliers
1. Cut a Hole in the Material
Carefully cut a hole in the material with a sharp utility knife where the eyelet or grommet will sit. Make the hole wide enough for the barrel of the grommet to go in with a snug fit.
You can also use the grommet pliers to punch a hole in the material by setting a hole punching head. Squeeze the pliers where you want to create the hole and gently work it to loosen the fabric apart. Release the pliers, and you’ll find you have a perfect spot for the grommet.
If the fabric is thin and delicate, you can use a rigid backing material to help form the hole. A piece of leather or cardboard works well here. Put the stiff backing on the material’s “bad” side (inner facing side), and apply firm pressure to split the hole.
2. Insert the Grommet or Eyelet
Insert the grommet barrel through the hole, putting the flat side of the grommet on the good side of the material. Tuck any torn threads under the flat side to hide them.
At this point, you can use some liquid seam sealant on any frayed pieces of fabric around the hole, gluing them together and to the grommet to prevent future rips. It will also keep the material from stretching too far and wiggling out of the grommet over time.
3. Align the Grommet in the Pliers
Attach the grommet plier head to match the size of the eyelet or grommet you plan to install. One of the plier’s jaws will have an outward-facing, conical bump. The other jaw attachment will have a hole, making it look similar to a shallow donut-shaped dish.
Insert the flat side of the eyelet or grommet, which should be on the good side of the fabric, into the jaw with the hole to hold it in place. If you have a two-piece grommet, fit the washer around the grommet barrel on the wrong side of the fabric, putting it over the material around the hole to create a firm hold. Ensure you put the washer on with the rounded side facing out.
4. Attach the Grommet
Keep the fabric and grommet steady, and slowly press the jaw with the bump into the grommet barrel. Squeeze it firmly. The force will curl the sides of the barrel over, locking it in place against either the punched material, if you’re using an eyelet, or the washer.

Prevent Breaks By Using the Right Tools
Frayed fabric can break easily around a grommet, and a utility knife isn’t always the best choice for creating a hole. Instead, use a pointed awl to poke the material, which will separate the fabric rather than cut it.
The awl will also make it easy to attach the grommet to the material. Fit the awl through the material and put the grommet over it, starting with the barrel side. The rod then acts as a guide to easily slip the fabric over the grommet.

Use Interfacing on Thin, Stretchy Material
Interfacing is a thin material that stiffens stretchy fabric to prevent it from coming out of a grommet. It goes on the wrong side of the material to be hidden from view, usually attaching via ironing or sewing. The added structure will make it easier to install the grommet and keep the fabric from loosening out of place.
Use Pliers or a Screwdriver To Remove Grommets
If a split opens up and you need to replace a grommet, you can do so with a set of needle-nose pliers or a flathead screwdriver to loosen the barrel and remove the washer. Pliers work best on smaller grommets while a flathead can remove larger pieces.
When using pliers, place one jaw through the hole and place the other against the rim of the grommet. Squeeze to bend the washer. Repeat this process in two or three more places. The washer should now be easy to remove.
For a larger grommet, you can carefully hammer the head of a flathead screwdriver against the bent-over grommet barrel. Split the barrel in a few places, and the washer will slide off.
 Final Thoughts
Grommet pliers may seem like little more than glorified hole punchers, but adding one to your arts and crafts arsenal can completely change how you finish projects. You can now take on homemade drapes, purses, shower curtains, and so much more with the ability to add these professional details. Find a set to handle all of your planned projects, and follow these tips and tricks for beautiful, lasting results.
Featured Image Credit: Art_rich, Shutterstock
Contents
