
A garden is a perfect way to escape the daily routine and dive into a world full of blossoming flowers, delightful fragrances, and a serene atmosphere. However, even the most beautiful, lovingly made, and eye-grabbing yard does get somewhat boring over time. The good news is, there are lots of amazing ideas out there that can make your garden look and feel brand-new.
We took our time with this guide and picked the top-of-the-line plans that are equally affordable, easy to make, and will have a big impact on your garden. A little bit of patience, a set of basic tools, and sleight of hands—that’s all you’ll need! So, are you ready to check out what they’re all about? Let’s get to it!

The 20 DIY Budget Small Garden Idea Plans
1. Grow A Cheap Lawn From Seed by Savvy Gardening

| Materials Needed: | Grass seeds, sand, water, fertilizer |
| Tools Needed: | Shovel, garden hose/sprinkler, rake, fork/cultivator |
| Difficulty Level: | Moderate |
Do you think that a traditional lawn is just too expensive for your garden? Then lawn seeds will be right up the alley! In contrast to sod that costs $1.3 per square foot, seeds are as cheap as $0.25. And you won’t need any expensive tools or materials, just some sand, a bag of fertilizer, and everyday garden tools like a shovel, rake, fork, and a garden hose. On average, it takes 1–2 months to grow a cheap lawn from seed.
2. Pallets As Herb Gardens by Jen Around The World
| Materials Needed: | Pallets, wood panels, potting soil, weather-resistant screws, a can of paint |
| Tools Needed: | Power drill, screwdriver, staple gun, level, paintbrush |
| Difficulty Level: | Easy |
Pallets are dirt cheap; sometimes, you can even get them for free. However, there are many exciting DIY pallet plans you can make. For example, why not use pallets as herb gardens? This DIY project will only take 1–2 hours to complete, and you’ll be rewarded with a sight for sore eyes. As long as the pallets are big and sturdy enough to hold your herbs and soil, you’re golden. And when picking between different paint colors, go for something bold like pink, bright blue, or orange.
3. Inside-Out Tire Planters by Crafty Little Gnome

| Materials Needed: | Old tires, potting soil, paint, spray primer |
| Tools Needed: | A sharp knife, garden hose, brush |
| Difficulty Level: | Moderate |
Folks on a tight budget that need new planters ASAP will definitely like this one. Inside-out tire planters do require some DIY effort on your side, but nothing the average gardener can’t handle. Cut the tires, flip them out, place them in the yard and that’s it. Be careful not to hurt yourself with the knife! Thanks to their perfect shape, these planters look great even when half of the garden is occupied with rubber tires of different sizes. To add an aesthetic touch, add a layer of paint right after you prime the tires.
4. Mason Jar Bird Feeders by Natural Beach Living
| Materials Needed: | Mason/pasta jar, natural jute twine/rope, wooden dowel, birdseed |
| Tools Needed: | Scissors, glue |
| Difficulty Level: | Easy |
If you’re looking for a cheap small garden DIY plan that you can build with your kids, Mason jar bird feeders will be a great choice. They are incredibly simple to make and very fun to work on. The whole project will take less than an hour to complete. Put the jar as close to your windows as possible so that you can watch the birds eat. Grab any jar you have at home, wrap it with a sturdy enough rope, and hang it from a tree, fence, or clothesline. Finishing up, fill the jar with birdseed, and enjoy.
5. Make DIY Compost by Family Food Garden

| Materials Needed: | Soil, kitchen scraps, weeds, grass cuttings, food waste, leaves, cardboard, paper |
| Tools Needed: | Container, fork, rake |
| Difficulty Level: | Easy |
Ready-steady compost from the local store is, of course, very easy to use. However, for a relatively big garden, premium-quality fertilizer costs a pretty penny. Well, you can always make DIY compost using waste from your own yard and kitchen. Mix nitrogen (veggies, weeds, grass clippings) and carbon (hay, paper, cardboard, wood ash) materials 50/50 for the best results. On average, it takes 6–24 months for the waste to turn into compost.
6. Build A Tree Trunk Garden Path by Home Talk
| Materials Needed: | Cottonwood logs, motor oil, soil/dirt, wood chips |
| Tools Needed: | Tiller, Sticks, string, miter saw, level |
| Difficulty Level: | Moderate |
The best thing about this DIY plan—any tree type will work. As long as you’ve got easy access to some logs, you can build a tree trunk garden path in 1–2 days. Start by cutting the logs into trunks. Next, cover them with motor oil to avoid rotting, and place the trunks using a measuring string and level. To get the soil ready, we recommend using a tiller (or you can do this by hand). There are no strict rules here: add as many wooden discs as you see fit.
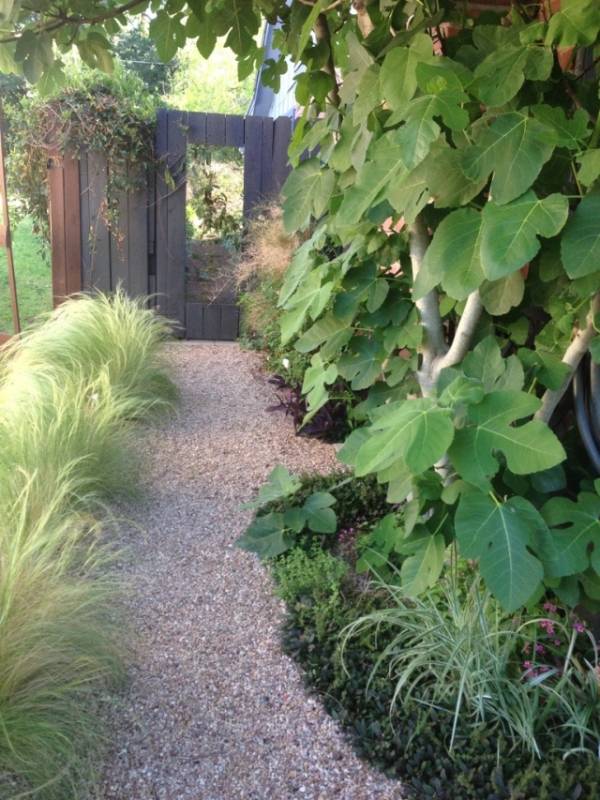
7. Put Together A Pea Gravel Pathway by Gardener Of Good And evil
| Materials Needed: | Gravel, decomposed granite, soil |
| Tools Needed: | Shovel, rake, protective gloves, hand tamper |
| Difficulty Level: | Easy |
Tree trunks do look awesome as a garden path, but they also take expertise and time to build. So, if you’re not ready to take on a project like that just yet, put together a pea gravel pathway instead. It will be a lot cheaper, that’s for sure. Plus, you’ll be able to get it done in 24 hours. See that you have enough gravel, soil, and granite. As for the tools, a sturdy shovel and a hand tamper will help build a lovely path for your garden.
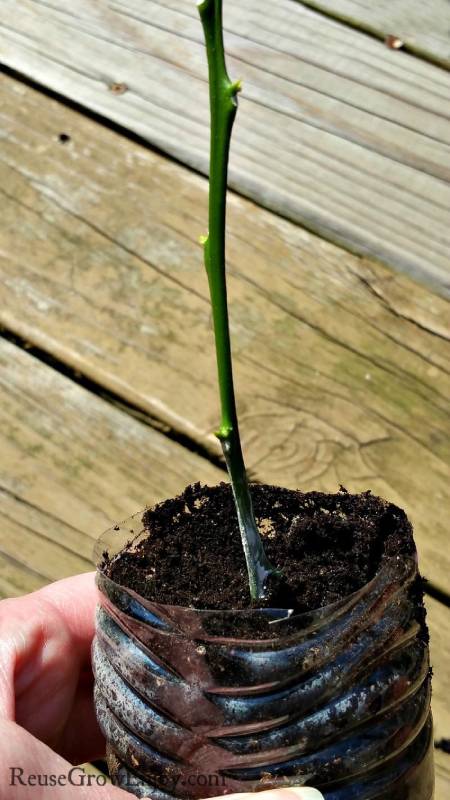
8. Grow New Flowers From Cuttings by Reuse Grow Enjoy
| Materials Needed: | Peat moss, perlite, water, flower cuttings, pots |
| Tools Needed: | Cutting tool, isopropyl alcohol (for sterilization) |
| Difficulty Level: | Easy |
Starting plants/flowers from seeds is fun and all, but at a certain point, it does get pricey. Luckily, there is a tried-and-true solution, and it’s called propagation. It’s when you grow new flowers from cuttings. And just like that, you cultivate an entire garden for practically nothing. Pick a stem/shoot you like, cut it to about 4–5 inches long, and remove all the leaves. Next, plant it into a pot filled with compost, water the shoot, and cover it with a plastic bag.
Please do keep in mind that not every single plant/flower can be propagated. So, check this before you get to cutting.
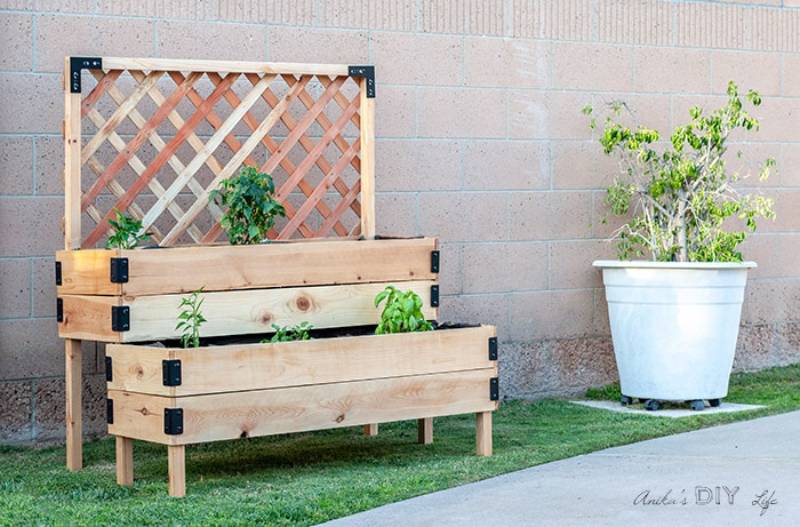
9. Go For A Tiered Raised Bed by Anikas DIY Life
| Materials Needed: | Landscape fabric, construction lumber, recycled fencing materials, corner braces, and plates |
| Tools Needed: | Miter saw, cordless drill + bits, pocket hole screws, sander, staple gun |
| Difficulty Level: | Moderate |
In some cases, Improvised pots and pallets are simply not big enough. If that’s exactly how you feel, go for a tiered raised bed. It will be equally useful for vegetables, herbs, and flowers, and can be a lifesaver in small gardens with limited space. Thanks to the trellis, you’ll be able to grow tomatoes, vines, and other climbing plants. Don’t rush it: take some time to figure out the right size of the planter box before you get to cutting and drilling.
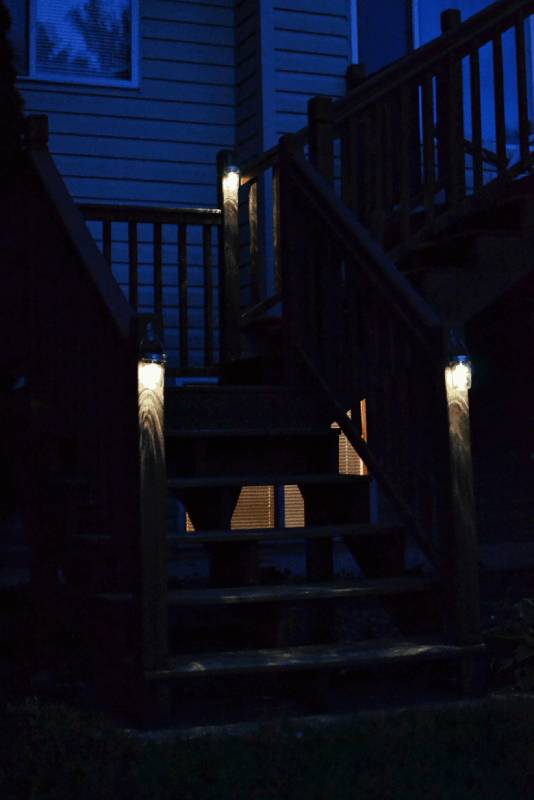
10. Hanging Mason Solar Jar by Bre Pea
| Materials Needed: | Solar lights (2.5-inch width) 18-gauge wire, hooks, Mason jars |
| Tools Needed: | Pliers (needle-nose), gloves |
| Difficulty Level: | Easy |
Very few things look as beautiful as solar lights in a garden during nighttime. And we’re happy to say that you won’t have to spend big bucks on fancy lanterns. Instead, you should build a hanging Mason solar jar—this will only take 30–60 minutes. So, we encourage you to build dozens of these and put them all over the property. The trick here is to find jars and solar lights that fit each other in size. Plus, you will have to take the plastic housing and the ring off the lights.
11. DIY Garden Hod by The New Lighter Life
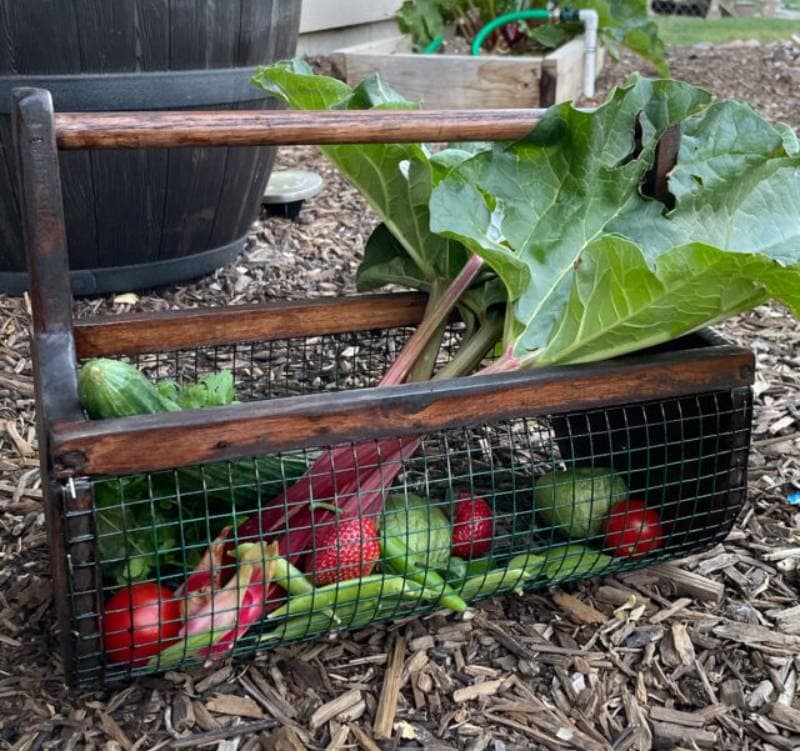
| Materials Needed: | Wood planks, wood dowels, wood glue, cloth, stain or sealant, sandpaper (60-grit), nails |
| Tools Needed: | Circular, table, and jigsaw, measuring tape, marker, square, paint can, pliers, sander, drill + bits, hammer, staple gun wood clamps |
| Difficulty Level: | Moderate |
Essentially, a DIY garden hod is a basket with a wire mesh at the bottom. If you’re tired of bringing in dirty produce, with a hod, you’ll be able to rinse them off without even entering the house. For an avid gardener that loves to eat produce from their own garden, this project will be a 10/10. Building it will take some time, however, and you will need a long list of tools, like a circular saw, a drill, and a staple gun. But, at the end of the day, this plan will pay off handsomely.
12. Lawn Edging With Gravel/Chippings by Farm Food Family
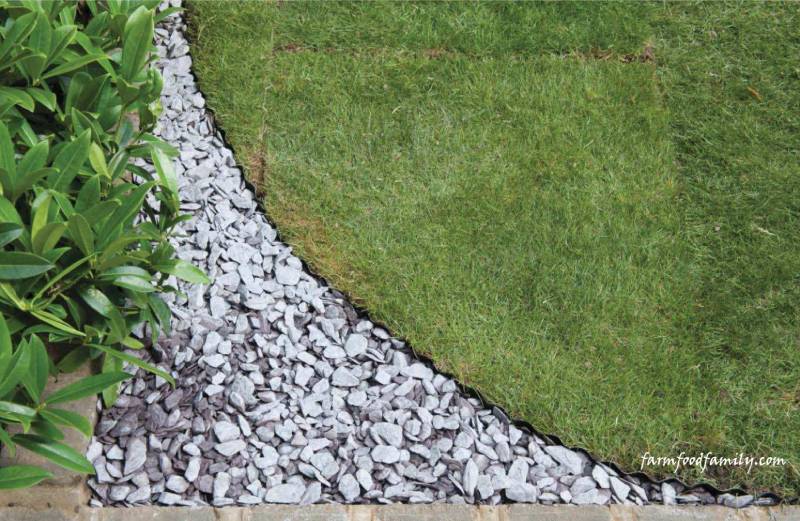
| Materials Needed: | Marker spray paint, lawn edging strip, gravel, chippings, or bark |
| Tools Needed: | Sticks, string, measuring tape, turf cutter (half-moon), spade |
| Difficulty Level: | Moderate |
Lawns look great in any environment—no doubt about that. Still, there are some tricks you can use to make them look even better. We’re talking about lawn edging with gravel/chippings, of course. And instead of using any strict, geometric forms, go with a circle or an arc. This way, you’ll be able to accentuate the lawn, make it come forward.
13. Floating Planter by Garden Therapy
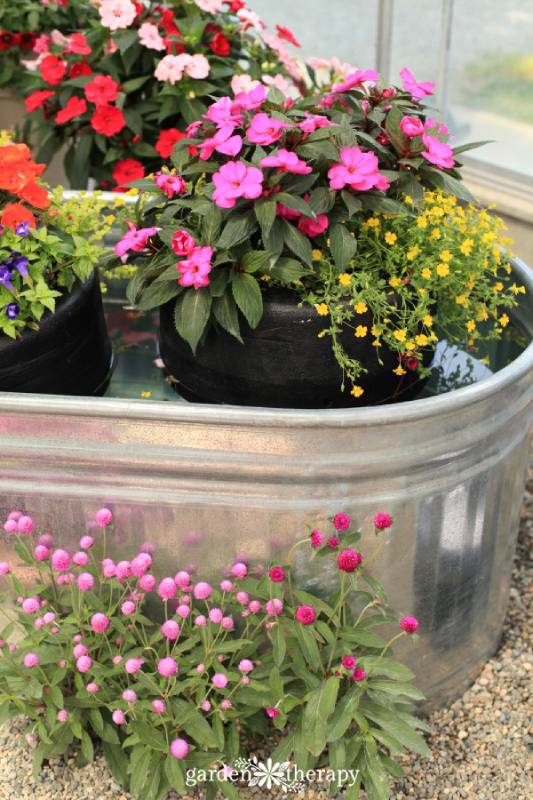
| Materials Needed: | Polystyrene sheets, latex paint, watering mat, nylon cord, blocks, bolt + nut, washers |
| Tools Needed: | Glue (latex-base), florist knife, scissors, gloves |
| Difficulty Level: | Moderate |
Got a pond right in the middle of your garden? Then consider building a floating planter. There’s nothing quite like having plants/flowers floating and growing on water. So, how is this going to work? The plan is rather simple: cut tire-like shapes from polystyrene, glue them together, paint, add some soil/fertilizer mix, and “set sails”! Oh, and don’t forget to drill holes on both sides. This way, excess water will have a way of escaping the planter.
14. Affordable Terra Cotta by Instructables
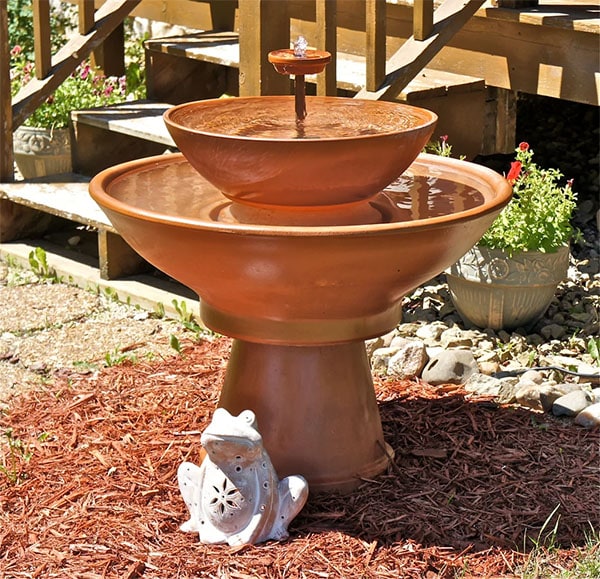
| Materials Needed: | Terra cotta planters (32” in diameter for the lower basin, 21” in diameter for the upper bowl), fountain pump, plastic pipe plug, pipe bushing, rigid plastic pump output tube, garden hose fitting, large brass washer, 1/2” copper riser pipe, female garden hose connector, small terra cotta dish, O-ring |
| Tools Needed: | Scissors, silicone, soldering iron, glue |
| Difficulty Level: | Intermediate |
If you’re seeking a significant DIY project to enhance the beauty of your garden, creating a terra cotta planter fountain could be a fantastic choice. It’s a bit more challenging than the previous project, but the outcome is worth it! This substantial size fountain will stand approximately 32 inches tall and hold a substantial amount of water. It’s a project that can be completed over a weekend, and the materials required are readily available at your local garden center.
15. Stamped Clay Garden Markers by Sarah Hearts
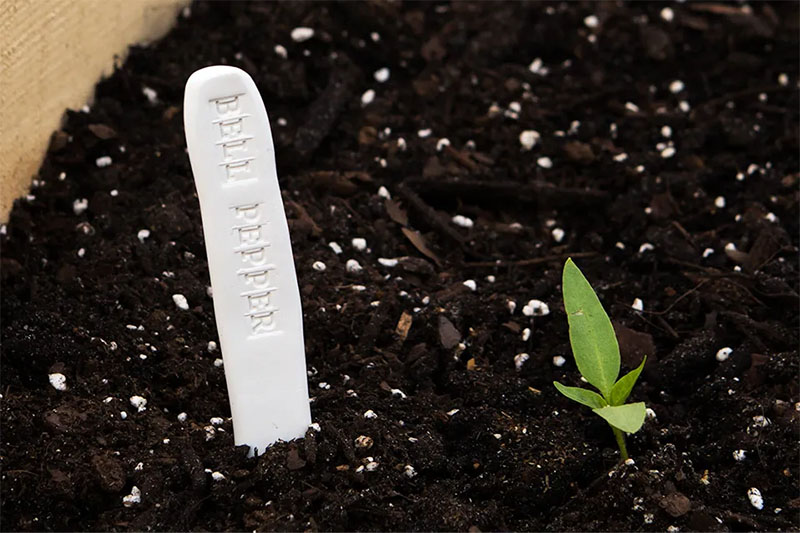
| Materials Needed: | Oven bake clay, alphabet stamps |
| Tools Needed: | Dinner knife, rolling pin, baking sheet, parchment paper, oven |
| Difficulty Level: | Easy |
Kick off your spring garden in style with these DIY Clay Stamped Garden Markers. These markers, easy to create and durable, won’t fade or wash off, providing clear identification for your plants. A perfect project to do over a weekend, these markers also make a great gift for your green thumb friends. Pair them with a potted herb or some cute gardening tools for a thoughtful present.
16. Simple Cedar Garden Box by One Little Project
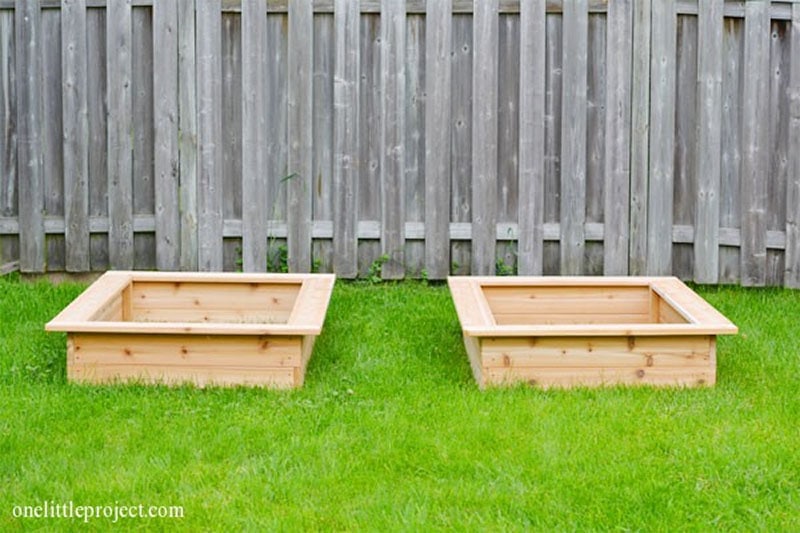
| Materials Needed: | 5/4 x 6 8-foot-long cedar decking lumber (x4), 5/4 x 6 10-foot-long cedar decking lumber (x2), 2 x 4 8-foot-long cedar decking lumber (x1), 50 wood decking screws |
| Tools Needed: | Pencil, straight edge |
| Difficulty Level: | Easy |
Craft your own garden box and enjoy fresh, homegrown vegetables all summer long. With this simple DIY project, you can build a neat and tidy raised garden box with cedar decking lumber, suitable for any backyard size. The cedar material will ensure your garden box lasts for many seasons to come.
17. Stone Planter Boxes by Honey Bear Lane
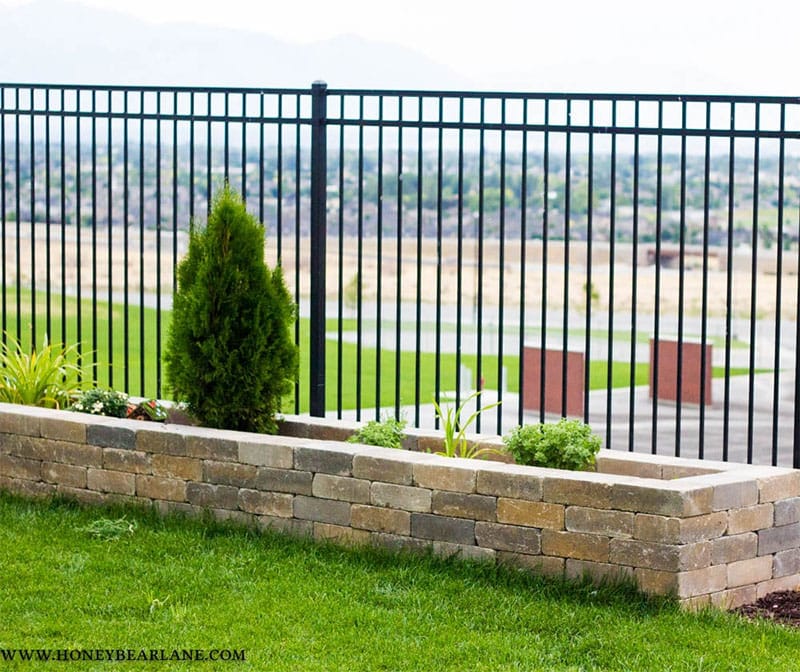
| Materials Needed: | Stones, paver base, paver sand |
| Tools Needed: | Wheelbarrow, shovel |
| Difficulty Level: | Advanced |
Add a rustic touch to your backyard with DIY stone planter boxes. This ambitious project might take some time and hard work, but the end result is well worth it. The stone planter boxes are a perfect home for your plants and can withstand harsh winter conditions.
18. Floral Plywood Bench by Burkatron
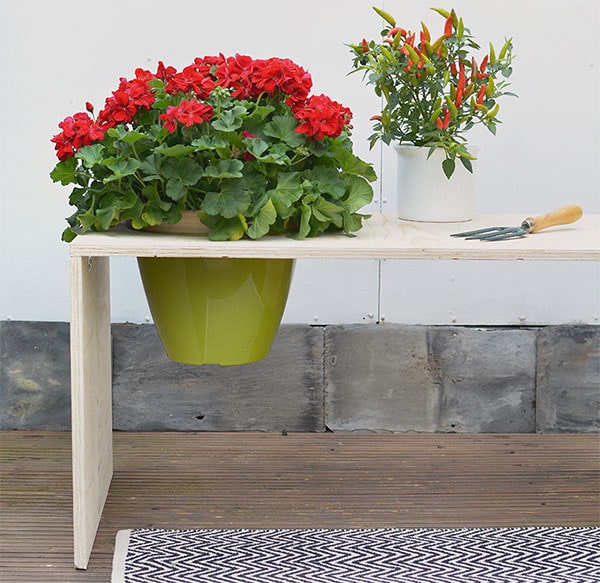
| Materials Needed: | Plywood (two 50 x 50 cm and one 100 x 50 cm), wood glue, four corner braces, flower pot |
| Tools Needed: | Screwdriver, jigsaw |
| Difficulty Level: | Intermediate |
Spruce up your garden with a simple flower bench. This DIY project transforms pieces of plywood into a beautiful bench, incorporated with a cut-out section for your favorite flowers. The bench serves as an excellent display for plants, adding a unique touch to your garden without spending a small fortune.
19. Budget-Friendly DIY Garden Fence by Fresh Exchange
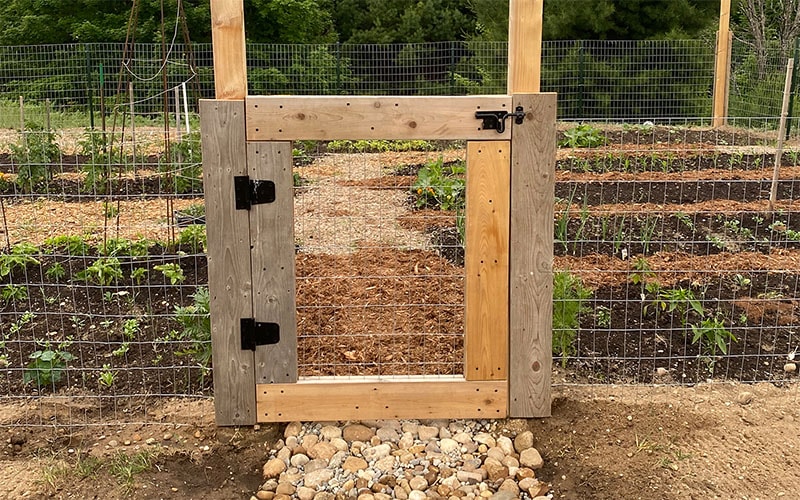
| Materials Needed: | Galvanized fencing, T-posts, cedar 4 x 4 posts |
| Tools Needed: | Power drill, pick axe, hammer, saw, level, shovel, post hole diggers, post driver, pliers |
| Difficulty Level: | Moderate |
Keep your garden safe from pests with a DIY garden fence. This project offers a cost-effective and simple design using galvanized fencing, T-posts, and cedar 4 x 4 posts for the corners. Besides being affordable, the fence is also easy to build and provides a decent aesthetic appeal to your garden. It’s a practical solution to ensure the fruits of your hard work are well protected.
20. Homemade Fairy Garden by Project Nursery
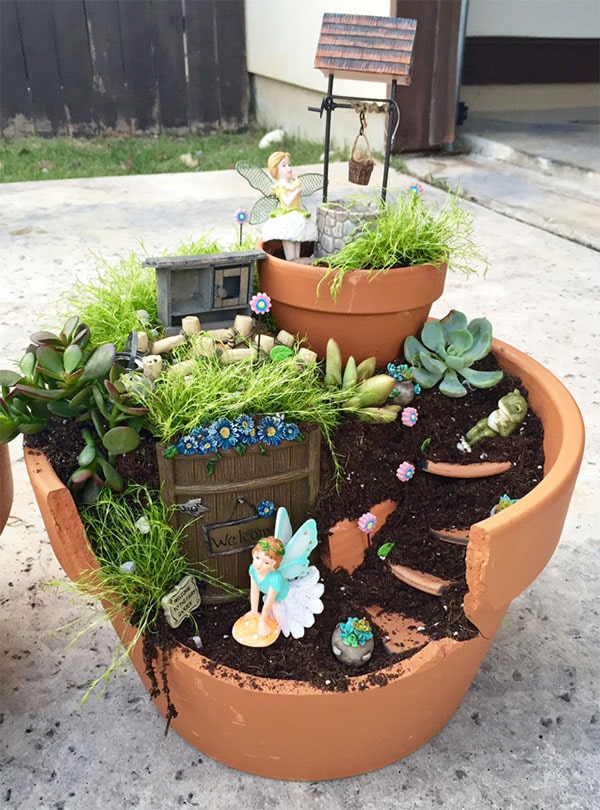
| Materials Needed: | Miniature fairy garden supplies, terra-cotta pots, succulent plants, fairy props |
| Tools Needed: | Small shovel, garden gloves |
| Difficulty Level: | Easy |
Difficulty Level: EasyBring a touch of magic to your backyard with a DIY fairy garden. This project is a fun and engaging activity for both adults and children. Using a variety of miniature fairy garden supplies, terra-cotta pots, and succulent plants, you can create a whimsical home for fairies. The project encourages creativity and imagination, making it an enjoyable family activity. The finished fairy garden serves as an enchanting addition to any outdoor space.
 How Can I Keep My Expenses To a Minimum?
Every single DIY plan that we just discussed is affordable. You won’t have to buy any pro-grade tools or hire contractors. With that said, there are still certain things you can do to keep the budget low:
- Always use reclaimed materials. Did you know that reclaimed stuff is 50–75% cheaper? That’s true, and it’s also more environment friendly. We’re talking about wood, bricks, and concrete, to name a few. You’ll find these on dedicated websites and residential construction dumpsters. Ask the owners, and they’ll most likely give you everything for free. Reaching out to family/friends for project leftovers is also a great idea. Last, but not least, check out the local salvage stores.
- Rent tools instead of buying them. This one’s self-explanatory. While rakes, hammers, and, say, screwdrivers aren’t at all expensive, miter saws, electric drills with bits, and sanders may cost a pretty penny. That’s why you might want to rent these instruments. Again, there are dozens of dedicated rental services in every city. Reach out, get a price estimate, and get your hands on those tools!
- Use gravel whenever you need rocks. It’s no secret that gravel is one of the cheapest rocks on the planet. On top of that, it is (relatively) lightweight and has excellent drainage characteristics. If you don’t have any gravel around, crushed granite rocks or river rocks are worthy alternatives.
Conclusion
The best thing about a garden is you don’t ever have to stop perfecting it. And we’re not even talking about planting exotic flowers, adding a brand-new drainage system, or fixing the pathways. You don’t have to spend weeks on a project or empty your bank account to flip the garden around. Willingness to try new things and genuine love for recycling can make wonders happen.
The projects that we checked out today are just right for keeping the backyard nice and fresh. Sometimes, introducing bold new colors and experimenting with different designs leads to breathtaking discoveries. So, pick an idea/plan from the list, follow our guides closely, and get your creative juices flowing!
You Might Also Be Interested In:
- 20 DIY Projects with Bricks Plans You Can Make Today (with Pictures)
- 20 DIY Projects with Bricks Plans You Can Make Today (with Pictures)
- 11 DIY Wood Garden Edging Plans You Can Make Today (with Pictures)
- 10 Types of Garden Hoes & Their Pros & Cons (with Pictures)
- 5 Types Of Grass In Texas: Top Choices For Your Lawn (With Pictures)
Featured Image Credit: JillWellington, Pixabay
Contents
