
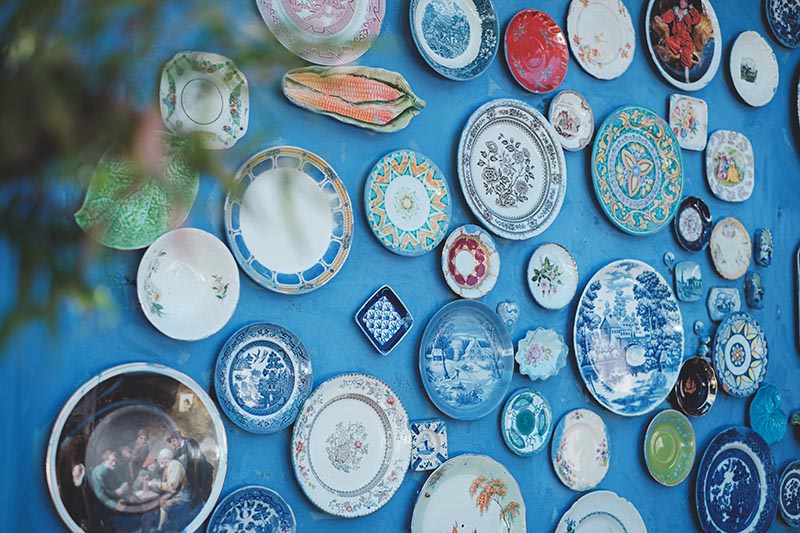
If you like decorating the house to breathe new life into it, you’ve probably already had pictures, clocks, lights, and tapestry on the walls. But what if all that stuff isn’t “cutting it” anymore? Well, how about switching to plates? Now, putting a bunch of dinnerware on the walls might not sound very exciting. However, if you approach this creatively, you’ll be amazed by the results!
But wait—how do you hang them? Will you have to drive nails through the wall? How much will that cost? We’ve got you covered! Read on, and you’ll learn the best tips and tricks for nailing, gluing, and hanging plates on the wall without breaking a sweat. Get the dishes ready, and let’s do this!

Getting Everything Ready
To get this done, you’ll need a hammer, a pack of nails, and a pair of work gloves. Or, if you don’t want to ruin the walls, make sure you’ve got some double-sided tape and adhesive discs around. Also, prepare a measuring tape and level tool. Don’t worry: this stuff won’t cost much. Besides, we bet you already have some of this stuff. Here’s the full list:
| Tools Required: | Materials/Products Needed |
| Measuring tape: | Blue painter’s tape |
| Hammer | Double-sided tape |
| Pencil or marker | Adhesive discs |
| Pencil or marker | Butcher paper |
| Pair of scissors | Wire hangers |
| Work gloves | Pack of nails |
| Time Needed: | 1–3 hours (on average) |
| Estimated Cost: | $30–50 (for the materials) |
| Difficulty Level: | Easy/Beginner |
How to Hang Plates on the Wall
1. Start by Measuring the Wall

Find a bare wall that has enough space and can hold your plates. Next, grab a measuring tape and calculate the height and the width. This way, you’ll know in advance what you’re working with. If you’re serious about decorating a wall with plates, but there are no “free” walls in the house, you can always move the furniture around.
Don’t rush it, though. The beauty of plate décor is that it will work even in limited spaces. As long as there’s an opening between the couch and the closet, above the living room door, or the kitchen counter, that means you can (and should) put it to good use.
2. Do Some Preparatory Arrangements
Take every single plate that you want to display on the wall and put them on the floor, table, or any other large surface. The goal here is to “test-drive” different sizes, designs, and color combinations until you’re 100% happy with the way things look. Consider placing the bigger and more colorful plates closer to the bottom—the composition will look better that way.
3. Taping Comes Next
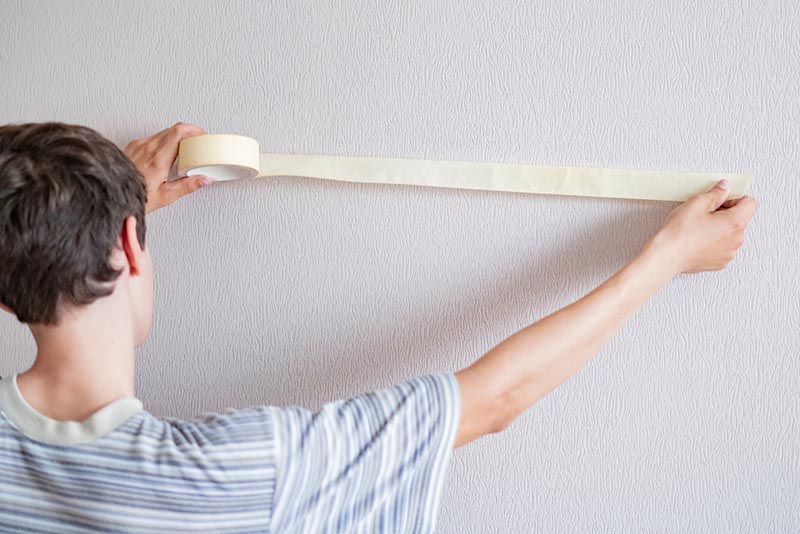
If the arrangement looks good, and that’s exactly how you want the plates to be placed on the wall, there’s one more thing to do before you hang/stick them. Grab some painter’s tape and mark the spots where the plates need to go. You don’t have to be scientific about it, but do try to match the size of the plates with the tape1 so that you know which dish goes where.
Begin with the biggest plate or the one that’s going to be sitting in the center of the décor. The distance and the size are the two factors to keep in mind while you’re at it. Don’t have enough tape to waste? A pencil or a marker will do; just make sure it can be erased later if need be.
4. Alternative Approach: Paper Templates
Mapping with painter’s tape doesn’t always work. While it will be enough for a pro, for a DIY enthusiast, it might not help with finding the perfect arrangement. If that’s the case, butcher paper2 will be your best bet. Place a large enough piece of it on the floor/table and put the plates on it. Play around with the sizes, designs, and placement a bit until you get it right.
With that out of the way, use scissors to make paper templates for each plate. A pencil or marker will help with that. Now just use painter’s tape or double-sided tape to glue the templates to the wall. This way, it will be much easier to understand what the final décor will look like. And when you’re ready to put real plates on the wall, the templates won’t be hard to remove.
5. Make Sure the Plates Are Clean

This part is often overlooked by many aspiring designers and DIY décor fans, but it’s a very important one. The cleaner and drier the plates, the easier it will be to hang them. No need to buy any expensive formulas: some warm water, dish soap, and a damp cloth will get it done. You will have to be very thorough, of course, and get all the dirt and grease out. Give the dinnerware an hour or two to dry, and only then get to hanging.
6. Get the Adhesive Discs Out
Specifically designed for sticking décor elements on the walls, adhesive discs are perfect for today’s gig. They have enough holding power to handle vintage plates. Check the instructions first, though, paying extra attention to their holding capacity. To activate the glue, add water to each side and use your fingers to mix it with the adhesive. Wait for 2–7 minutes for the glue to set.
Stick the disc to the back of the plate; glue the other side to the wall. The painter’s tape or paper templates we used earlier will help with the arrangement. This is important: most discs don’t have glue on both sides. Instead, they are equipped with hangers that go over command hooks. Alternatively, you can get a set of 3M plate hangers, but they won’t be able to hold heavy plates.
7. Or Use Wire Hangers Instead
If you’re not a big fan of glue and want to use wire hangers instead, order them online or buy them at a local store. On average, good-quality hangers will set you back $5–15; the more you buy, the bigger the discount will be. The hangers will come packed with mounting hardware (like nails and hooks) and plastic sleeves/grippers to protect the edges of the plate.
Also, check the size and weight capacity. Premium wire hangers can work with big and heavy plates. Spring wire hangers are the best choice here: they’re reliable and long-lasting. So, grab a wire hanger and attach it to the plate. Bend the hanger a bit so that the plate sits firmly against the wall. Next, drive the nail in with a hammer to hold the hook. If the walls are old and shaky, nail the hooks before you do any hanging.
8. Make Finishing Adjustments
If this is your first time decorating the walls, chances are you made minor mistakes here and there. Maybe some of the plates aren’t perfectly aligned, or the bigger dishes look a bit ridiculous on the wall—that’s totally fine. Adhesive tape costs next to nothing. So, you can rearrange the whole composition (like swap the plates or move them around a bit for cheap.
With hanging wires, that will take a bit more effort (unless they’re adjustable). Still, even if you make new holes in the wall while trying to find the perfect spot, the plates will hide them. To fix the horizontal placement of the plates, use the level tool. And one more thing: wire hangers make it easier to remove the plate from the wall to use for dinner and put them back up.
9. Summing Up

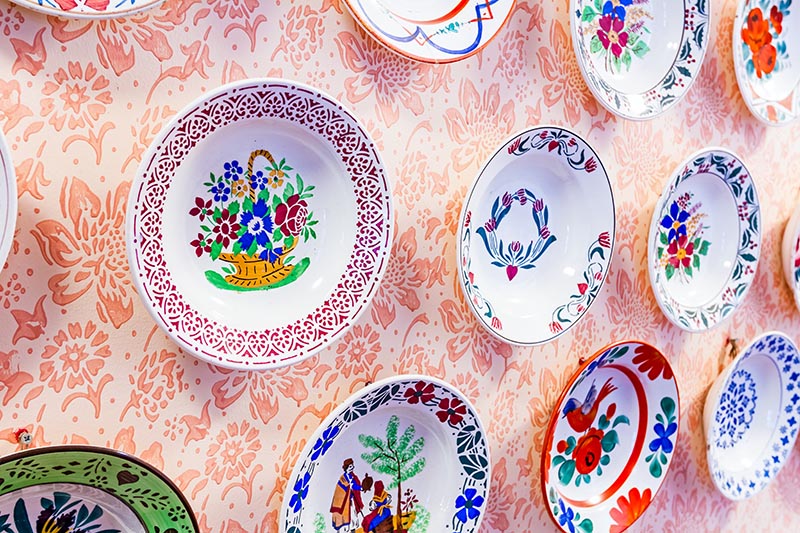
The key takeaway is that you don’t have to follow any strict rules here. Go with whatever ideas come to mind. Black and yellow, gray and blue, oval and square-shaped—whatever works! Don’t have any decorative plates around? No worries, you can get them for cheap at antique shops or thrift stores. And if you’re ready to invest in vintage plates, they won’t cost that much, either.
Minimalistic plates go well with industrial designs; big, bold, and colorful ones, in turn, will feel at home in a maximalist décor. And remember: plates look great when put right next to your favorite photos and art pieces. This will create an even bigger impact and give you more artistic freedom.

What About Silicon Glue or Safety Pins?
Why not just add some glue to the back of the plate and stick it to the wall? Well, there are two major downsides to this. First, you’ll leave residue on the wall; second, you might damage the plate when trying to unglue it from the wall. If you want to keep it there forever, this might work.
The same is true for bond tile glue or any other brands available on the market. As for paper clips or safety pins (it’s when a pin is put around the plate and glued to it using hot glue), it’s a bit risky. You never know when the glue might lose its strength and leave the plate hanging (pun intended).
Why Do People Hang Plates on the Wall?
The fine tradition of putting plates on the walls has been around for many centuries. Today, it’s making a huge comeback as part of retro-inspired décor. You can put plates up to free up space (if you have a tiny kitchen), make an artistic statement (like hanging the plates that you got from your grandparents), or add extra colors to a boring wall.
The big pro here is that you’re not obligated to commit to this idea. If you don’t want the plates to hang around the house forever, use adhesive discs instead of wire hangers. This way, it will be much easier to remove the plates at any moment later without wreaking havoc on the walls.
Décor Ideas for Putting Plates on the Wall
How do you figure out the right spot for the plates? What’s the best way to arrange them? If you find yourself struggling with this a bit, try drawing inspiration from others. Here are some great ideas to get you started:
- One of the biggest trends in wall décor is mixing things up. Instead of following strict rules of composition to make the plates symmetrical, do the opposite. Next, experiment a bit: try matching the overall color tone and patterns/textures or introduce new, bright colors to switch the mood.
- Another timeless classic is when the plates hang over a bed or the fireplace (the mantel, to be exact). If this is your first time using plates as an element of décor and you want to play it safe, the fireplace and the bed will be a great place to start. Use smaller plates and go from there.
- And let’s not forget about the walls and the windows! Putting even a single plate right above a door or a pair of windows will make the room feel more spacious. And the more light you let into the room, the better. Again, try small or average-size plates first, as they tend to work better.
- If you have limited space, you can always place the plates in a vertical or horizontal line to make a statement.
- A backsplash is also a great place for your dinnerware. Besides, if you need one of those plates for a dish, you can just grab them off the wall.
- Putting the plates around the TV could work, but it’s more of an acquired taste and doesn’t always “click”.

Conclusion
Décor doesn’t have to be exhausting or cost a pretty penny. There are tons of ideas out there that take little effort yet turn the interior around. Hanging plates on the walls is definitely one of those rewarding DIY plans. You won’t need to buy expensive dinnerware, pay someone for the job, or spend days on this.
Just find some free space on one of the walls, use painter’s tape to mark the spots, and get to hanging or sticking! Follow our guide closely, and you’ll be done in a couple of hours while spending $20–50 on the whole project. Even if you don’t want any plates up there, you can still put these skills to good use!
Related Read:
- How to Hang a Skateboard on the Wall (Step-by-Step Guide)
- How to Hang Curtain Lights (5 Expert Tips)
Featured Image Credit: Lachlan Ross, Pexels
Contents
