

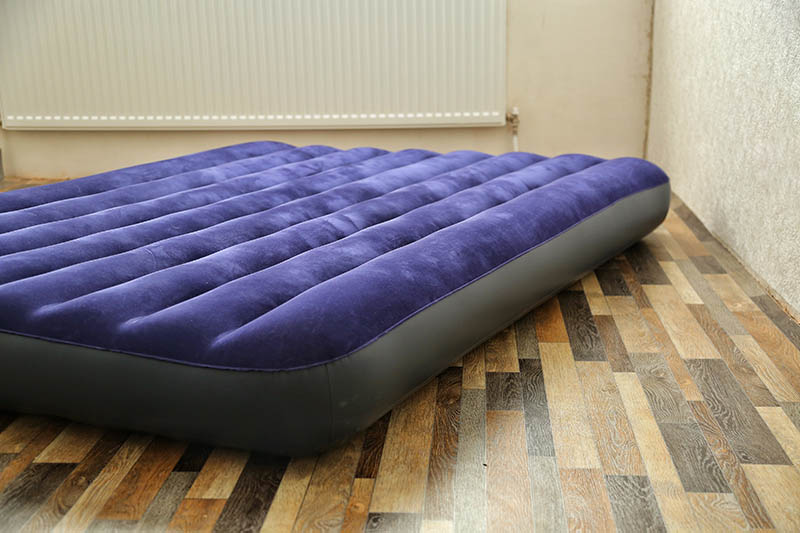
Air mattresses are wonderful accessories in any home. Whether you are out camping or hosting friends over, they are easy to make and are a convenient alternative to the standard bed. Unfortunately, accidents happen, and your air mattress may suffer damage on the surface at one point or another. These air beds are highly susceptible to abrasions, leaking, and punctures. Even with proper maintenance, your air mattress is likely to experience leaking in its lifespan.
So, how can one patch a leaking mattress? You will be surprised to learn that it’s easy to find and fix air mattress leaks with the proper tools and guidelines. In this article, we will highlight 11 tips on how to patch an air mattress. We will also discuss why air mattresses leak in the first place. Read on to learn more.
 How to Find the Leak
 How to Find the Leak
Before you get down to patching the leaking mattress, you must first find the exact spot that is leaking. Inflate the mattress to full capacity to check for leaks.
- Look for damaged or loose gaskets: You can check for air valve failure by placing your hand over the valve to check if any air is escaping. Ensure that the valve is fully plugged in and is not leaning back out from the stem. Afterward, inspect to see if the area surrounding the stem has any holes or tears in the seams.
- Position the air mattress on its side to inspect the bottom for leaks: It shouldn’t come as a surprise that most of the punctures and leaks in air mattresses are often present on the bottom side. Many sharp objects on the floor can poke through the surface and deflate the air mattresses.
- Listen for any hissing sounds emanating from your airbed: After lifting the mattress and leaning it on its side, position your ears approximately 2–3 inches away from the air mattress. Then, slowly move your head across the surface, starting from the bottom, to the sides, and finally to the top.
- Try to feel for escaping air by running your hand over the surface: Hold the back of your hand about 2 inches away from your air mattress. Then use your other hand to push it in to increase the air pressure of air escaping from the leak. Finally, move your hand across the surface of the air mattress until you feel a steady stream of air. That’s where the leak will be located. For easier detection, you can wet the back of your hand before running it across the surface of the air mattress. The water will feel cooler if there is a leak.
- Spray soapy water on the surface and look for bubbles: If all the other methods fail, you can use dish soap to detect the leaks. Mix the dish soap with water to make a soapy solution and add it to a spray bottle. Spray the soapy solution on the surface of the mattresses, starting from the seams and valve and spreading out.
- Circle the puncture hole with a marker for easier identification: Once an air mattress is deflated, it is extremely difficult to find the leak you had initially discovered. However, you can draw a small circle around the hole so that you can know where to fix the patch later.
How to Patch an Air Mattress
1. Deflate the air mattress completely
You must first deflate your air mattress before applying any fix. Otherwise, air will get into the patch and destroy the adhesion. To deflate the air mattress, undo the valve to allow air to escape. Exert some pressure to remove the rest of the air via the valve if the air doesn’t come out.
2. Use 120-grit sandpaper to smooth out area around puncture holes

If the puncture hole is located on the mattress’s surface and is fuzzy in texture, sand out the texture to make it easier for the patch to stick to the material. You can do this by gently exerting some pressure as you sandpaper your air mattress. However, be careful not to press too hard because the sandpaper could thin out the surface too much, and create another hole.
Some air mattress brands offer 120-grit sandpaper with their mattresses so you may not need to buy it separately.
3. Use isopropyl alcohol to clean area around leak
If you attempt to apply a patch on a wet air mattress surface, chances are it will not stick and will come out later. So before patching, use a cloth dipped in isopropyl alcohol to wipe off the area surrounding the leak to remove any dust, dirt, or debris. After cleaning, dry the surface with paper towels, then let it air dry.
Use a vinyl patch kit to patch the air mattress. With a vinyl patch kit, you get all the necessary tools to patch the holes. Use the scissors provided to cut a patch extending up to 1 inch so that it slightly extends past the hole’s edges. Then, round the patch corners to prevent future peeling. If a patch kit is not at your disposal, use a piece of sturdy plastic, such as a vinyl shower liner.
4. Use rubber cement or an adhesive backing

Some air mattress patches come equipped with an adhesive backing. If you have one, remove the backing paper and press it against the puncture hole. If your patch is not equipped with any adhesive, use rubber cement. Spread it across the back of the patch and the area around the hole. Then firmly press down the patch to create a strong bond with the air mattress.
Ensure to follow the guidelines stipulated in the patch kit packaging. Also, ensure the adhesive doesn’t get inside or any other surface of your air mattress. The adhesive can easily force the inside of your airbed to stick together and potentially create new tears.
5. Place weight over the patch for 6–8 hours
You can either opt to place workout weights or a stack of heavy flat books (up to 10 pounds) on the patch while the adhesive sets. Usually, adhesives need time to set and cure to seal puncture holes, and this can take between 6 to 8 hours to fully cure.
But to ensure a stronger bond, the adhesive should cure for 24 to 48 hours. The air mattress must remain deflated while this happens. If you inflate it before the adhesive cures, the pressure will force the patch to get loose. Also, the patch will only provide a temporary solution.
6. Inflate the air mattress to check for more leaks

After finishing your patchwork, you should re-inflate the airbed to check if the leaks have been successfully patched. Place your ear next to the patch and listen to any hissing sounds. If the air mattress is not urgently needed, it’s best to leave it inflated overnight and check to see if any air has escaped in the morning. If air is still escaping from the patch, the adhesive probably did not work. You can try re-patching or purchasing a new air mattress.
7. Use duct tape as a temporary fix
Sometimes you may lack the necessary tools or the time to patch a leak on an air mattress. In such a situation, you can cut off a piece of duct tape (about 5 inches) and stick it across the puncture hole. Press the duct tape over the air mattress to remove any wrinkles or raised edges.
For extra protection, you can even add four more pieces of duct tape along the edges of the first strip. Sure, the adhesiveness of the duct tape will decrease after inflating your air mattress several times but it will still serve you for a few nights.
8. Use a hot-glue gun to fix tears on the seams
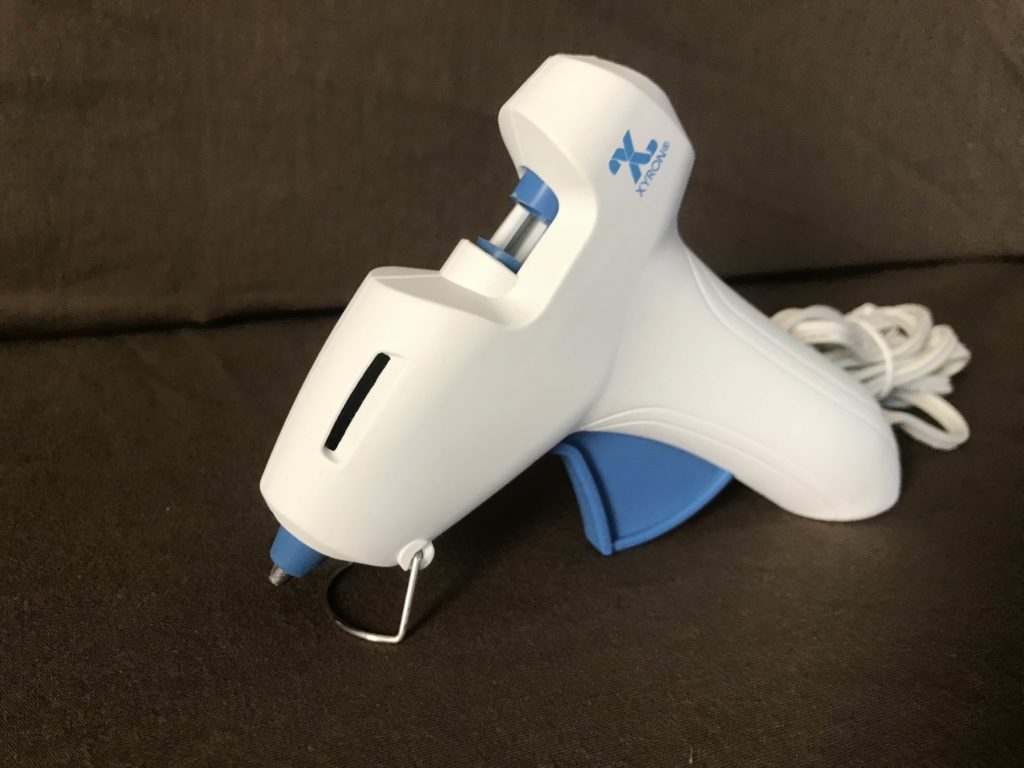
If the tears are located on the seams of your air mattress, you can use a hot glue gun to fix the leak. Heat the hot glue gun in the lowest temperature setting. Deflate the air mattress and smooth out the ripped section so that it lays flat on the ground. Once the glue gun is hot enough, run a bead on the tear edges and wait for 10 minutes for the glue to dry.
- Note: Hot glue tends to break down and crack after inflating the air mattress several times. So, you might want to patch it as soon as possible. Also, prevent contact between the hot glue gun tip and the mattress because it can melt the material and make another hole. Also, using this DIY method could render the manufacturer’s warranty policy void. Ensure that you read the warranty to know if you are eligible for replacement after using this method.
9. Cover the puncture holes with superglue
If the puncture holes in your air mattress are small, then a dab of super glue will be best suited to patch those holes. Larger holes may need an actual patch or duct tape.
Once you have deflated your mattress, apply super glue directly over the pinholes. This will create an even, thin layer over the surface of the air mattress. However, ensure the glue doesn’t touch any other part of the air mattress because it can create more holes.
Let the glue cure for about 4 hours. Inflate the air mattress to check if the puncture holes were fully sealed.
10. Seal the leak with a flex seal tape
You can also use flex tape to DIY patch holes in an air mattress at home. Cut the flex tape in a circular shape extending past the hole edges by at least 1 inch. Deflate and smooth out any wrinkles on the surface of the airbed. After peeling off the backing paper of the flex tape, press it firmly on the air mattress and let the Flex seal tape sit for about 15 minutes.
11. Use a shower curtain liner to make a patch
If your air mattress is made from PVC or plastic materials, you can use a shower curtain to create an effective patch. Cut the shower curtain to create a rounded patch at least an inch bigger than the puncture on all sides. Clean the problem area and apply a strong adhesive to stick the patch onto the air mattress.
For a stronger bond, remove the air bubbles by smoothing the surface and place some weight or books for at least eight hours for optimum results.
Why Do Air Mattresses Leak?
Before you undress and deflate your air mattress looking for leaks, you should first understand how your mattress behaves. Usually, all air mattresses, despite the brand, naturally deflate. So, the firmness of the mattress could naturally go down without necessarily having any leaks. This phenomenon happens due to changes in environmental temperature. Your air mattress will shrink in cold air (usually at night) and expand to retain its firmness when the temperatures go up.
Furthermore, air mattresses naturally lose air because it takes a while for a new mattress to stretch into its exact volume and shape. So, don’t be surprised by the flaccidity of your new mattress. Give it time to stretch by inflating it regularly. If it remains flat, then it may have a puncture.
Therefore, it is important to consider that air mattresses deflate naturally. This will help eliminate it as a potential source of air mattress deflation. Other than natural deflation, the other causes of deflation in air mattresses include rips and little holes in the air mattress caused by different reasons such as overstretching and over-inflation. The other major cause of leaks in air beds is damage to the gasket.
Conclusion
Finding your air mattress deflated is never a pleasant experience. Unfortunately, it is a commonly occurring issue. It is also fairly easy to repair leaks and punctures on an air mattress. With a few easy steps, you can patch leaks on an air mattress using commercially sold patch kits or by making your own at home.
You need to locate the position of the leak, clean the area thoroughly and patch the puncture holes. The most effective method of patching holes in an air mattress is using a patching kit. Sure, DIY methods such as using duct tape can work too, but they only provide temporary solutions. If the problem is too serious, you can always contact the manufacturer or purchase a new one.
Meanwhile, ensuring proper storage while the air mattress is not in use will significantly reduce the risk of accidental damage. Also, make sure you buy quality air mattresses from a decent brand that offers warranty coverage.
Related Read: How to Repair the Fabric Side of an Air Mattress – 5 Easy Steps & Methods!
Featured Image Credit: Lost_in_the_Midwest, Shutterstock
Contents
