
Door knobs are a minor consideration that can make a massive difference in the aesthetics of a room. If you want a quick way to upgrade your room functionally and cosmetically, a new knob may be the answer.
When you’re ready to swap out your hardware, you may be wondering how to remove an old doorknob. The solution isn’t always as obvious as removing the first screw you see. If you’re left scratching your head, we’ll show you how to take an old doorknob off in three simple steps.

How to Remove a Doorknob (3 Steps)
1. Determine the Knob Type and Remove the Lock Side Knob

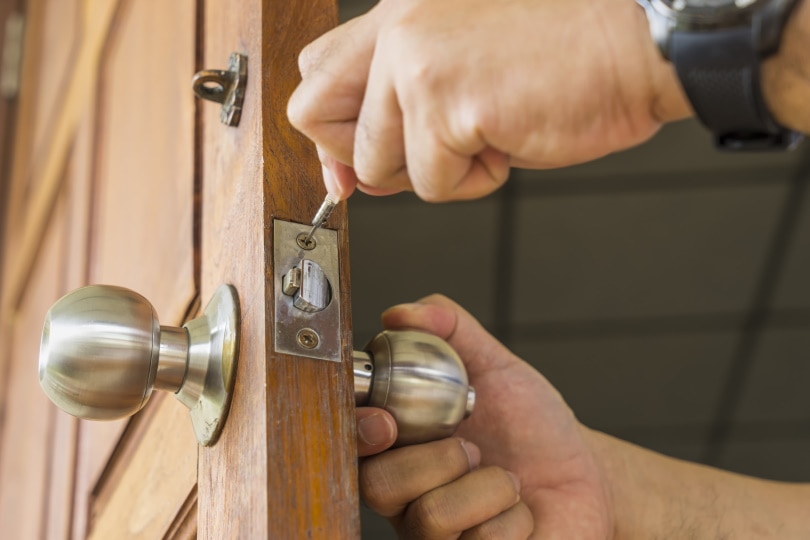
Before you begin, you’ll need to understand the kind of lock that you are trying to remove. Most doorknobs conceal the hardware for aesthetics, but you can begin dismantling them from the lock side.
To remove a doorknob, check around the spindle on the side of the knob that locks for a small slot, pinhole, or hex screw. The spindle is the shaft connecting the two knobs. Once you find the hole/screw, use one of these methods to disconnect the doorknob:
- Slot: Insert a flathead screwdriver to press the release on the doorknob
- Pinhole: Insert a paperclip to trigger the release
- Hex screw: Use an Allen wrench to unscrew the hex screw and release the knob
In some instances, the exposed screw heads going through the door knob’s rose, the plate that sits flush against the door, will hold the knob in place. Take out these screws to take the knob off and expose the mounting plate.
2. Remove the Lock Side Rose
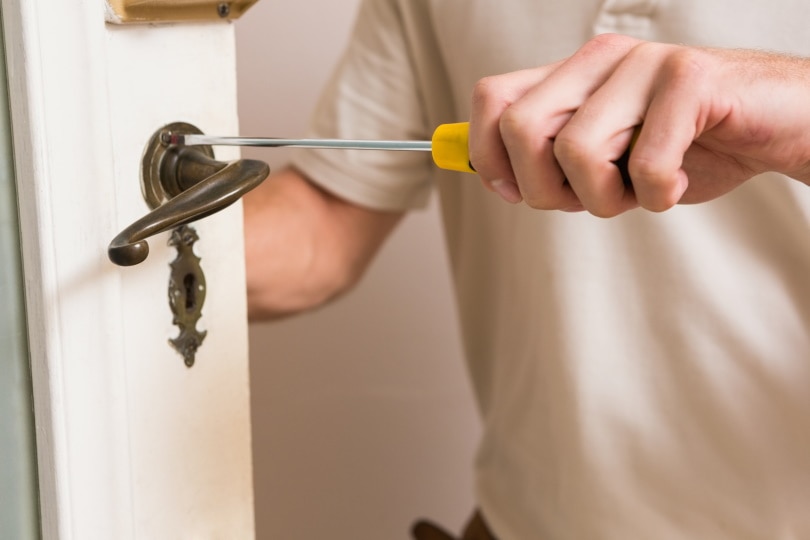
After removing the knob on the lock side, you’ll have to remove the mounting plate. To access the mounting assembly, you must first take the rose off.
If the rose doesn’t have visible screws attaching it to the door, look for a small indentation where it meets the door. You can fit a flathead screwdriver into this recess to gently pry the rose loose.
3. Unscrew the Mounting Plate and Disassemble the Knob
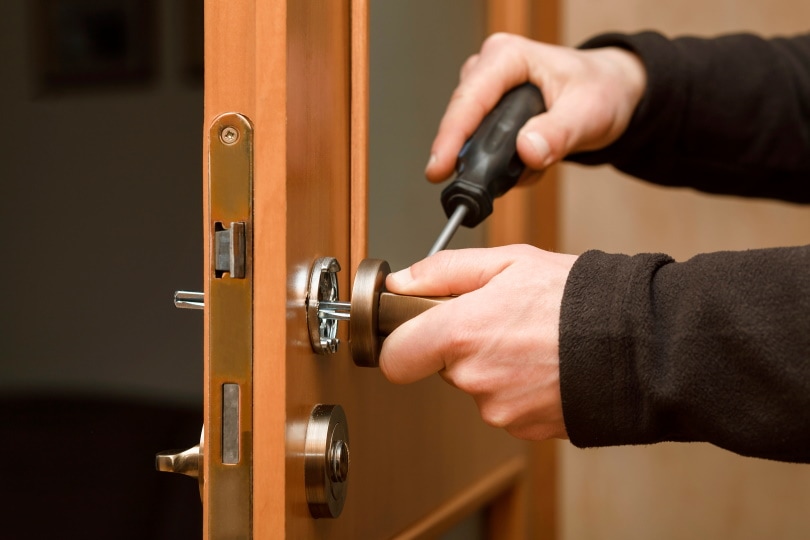
When you take the rose off, you will see the mounting assembly. There will be two Phillips or flathead screws running through the mounting plate, attaching the two knobs through the door.
Unscrewing and removing these screws will allow you to separate the doorknob and take off the remaining pieces. The knob on the other side of the door should pull off too.
Use a Phillips or flathead screwdriver to take the latch plate off the side of the door and pull the latch out. You’re now ready to attach your new doorknob.

Do You Need to Remove All of the Door Knob Parts When You Replace a Door Knob?
Most new door knobs come with everything you need in the package, including the doorknob assembly, strike plate, and hardware. If you are replacing a doorknob, it’s usually best to replace all the pieces, both for looks and performance. It’s crucial to be careful as you remove any screws and rose plates from the old assembly to avoid marring the door or ruining the screw holes.
See Also:
- How to Replace a Window with a Door in 7 Steps (with Pictures)
- How to Remove an IKEA Drawer in 7 Easy Steps
Conclusion
Once you take off the old knob, you can install your brand new assembly, improving the look, feel, and function of your door in just a few minutes. Door knobs seem simple at first, but they can quickly turn confusing when there are no visible screws. With these three simple steps, you’ll be amazed at how easy it is to remove and replace an old doorknob to refresh your space!
Featured Image Credit: Kawin Ounprasertsuk, Shutterstock
Contents
