

Using a table saw is pretty straightforward. However, you can get seriously injured with one. If you plan on doing any sort of DIY or woodworking, then you’ll probably need to use a table saw at some point. For this reason, learning how to use one safely is important.
In this article, we’ll go over everything you need to know about using a table saw—even if you’ve hardly ever touched one before. Read our article below for a complete explanation of everything you need to know when using one of these machines.

First and Foremost, Safety
Before we move any further, it is vital to go over some safety information. Many pros and home DIYers alike have experienced serious injuries when using a table saw. Even if you do everything right, there is always the chance of kickback, which can lead to serious injury. For this reason, it is important to do everything right to lessen the risks as much as possible.
If you don’t handle the saw correctly, the material being cut may be bound and jump back unexpectedly. When this occurs, the material will be thrown at a high velocity or jerk violently. When this happens, your fingers may be pulled towards the blade, or the material itself may become dangerous.
- Don’t turn on the saw when the material is already touching the blade and don’t touch the material to the blade until the saw is already on.
- Always use a miter gauge for crosscuts. While many people may use a rip fence, these don’t offer very good support.
- However, when you are making rip cuts, you should use a rip fence. Use tools for the job they’re intended for, and you’ll be far better off.
- When cutting, always keep the material flat on the table. Don’t pick it up or turn it while it is contacting the blade.
Furthermore, we recommend reading the safety guidelines that come with your particular machine. While most table saws are pretty similar, there are some slight differences between them. Reading these guidelines is vital to prevent accidents from occurring.
With that said, we do recommend wearing safety goggles and ear protection as well. While these may not make you completely safe, they do a good job of preventing unnecessary accidents.
The 2 Different Kinds of Cuts
To know what tool to use, you need to understand the different kinds of cuts a table saw can make. Usually, table saws are used for making pretty basic cuts. For instance, ripping is the most common cut, which simply involves cutting a piece of material to a certain length.
When you’re using a table saw, you’re likely making one of these cuts.
Crosscutting is the “opposite” of a rip cut. When crosscutting, you’re cutting the material to a certain length. Each of these cuts is slightly different, so here are directions for each.
Ripping
Ripping is the easiest, most straightforward cut to make. Most table saws have a rip fence that can be adjusted to certain widths. You can use these as a guide when cutting width-wise. This guide also helps control your material while cutting, which prevents accidents.
1. Fit the Blade into the Table Saw
First, unplug the table saw and fit a rip blade into the machine. You should use a blade that is suitable for the material you’re cutting. Next, adjust the blade’s height so that the blade is no more than ¼” above the material you’re cutting. Any higher than this may be a safety issue.
Doing this is pretty straightforward, though it can depend on your exact machine. You’ll need to loosen the arbor nut (typically with the arbor wrench that came with the machine). This nut holds the blade in place. With it loosened, you can adjust the blade as necessary.
Be sure that the blade is cutting towards the front of the machine. The sharp part should be facing you.
2. Position the Rip Fence
Next, you’ll need to position the rip fence to correctly cut the width you need. You’ll need to release the locking level, slide the fence to the correct position, and reengage the lock. You may need a ruler to position your cut correctly. However, a precision tape measure is also a solid option and tends to be more accurate.
Be sure to always measure before you begin to cut. Measure from the closest edge to ensure that you’re accounting for the amount of wood that will be cut away.
3. Place the Material
Now that you’re ready, plug the table saw in and place the material on the table. While you should align it with the rip fence, don’t let the material touch the blade until you’ve turned the saw on and allowed it to reach full speed.
Placing the material in touch with the saw before it is turned on is a sure recipe for a kickback.
4. Make the Cut
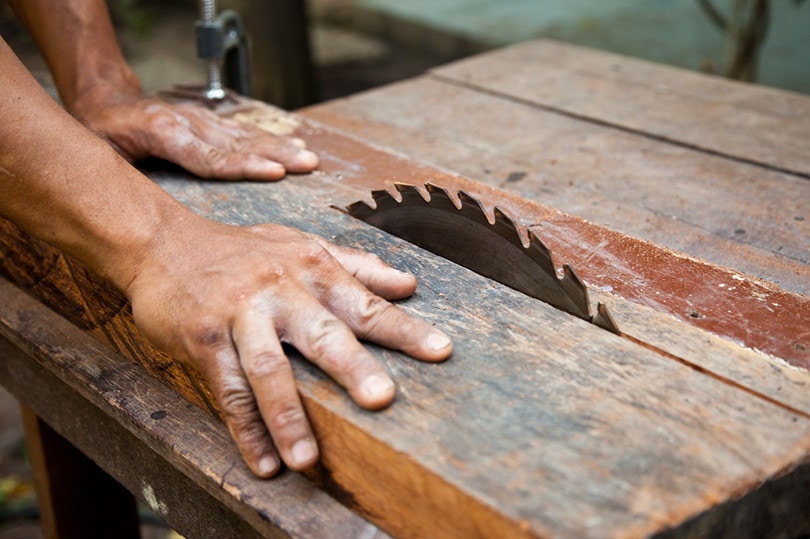
After the blade has reached full speed, it is time to slowly guide the material to the saw. Use the rip fence as a guide and for support to prevent kickback. Keep the material flat against the table and snugly aligned with the fence (for both accuracy and safety reasons).
If you’re handling larger pieces, you’ll probably want to use two hands. Sometimes, you may need a helper or support table for extra-long materials.
Crosscutting
When you’re crosscutting, you shouldn’t be using a rip fence as a guide. Crosscuts are usually quite narrow, which means that a rip fence wouldn’t provide enough support. Instead, you’ll need to use a miter gauge. Not all table saws come with these, so you may need to purchase one separately.
1. Insert the Blade
Unplug the saw and insert a crosscutting blade that is suitable for the material you plan on cutting. We provided an in-depth discussion on adjusting the blade above, so you may want to go back and read that if you run into any hiccups.
Next, use a protractor guide to make a straight or angled crosscut. Be sure to adjust the miter gauge correctly and double-check your measurements.
2. Secure the Material
You’ll need to secure the material along the miter gauge to ensure complete support. Use clamps to keep the material against the miter gauge if possible.
3. Turn the Saw On
Now that everything is adjusted, you can turn the blade on. Remember, don’t allow the material to touch the blade until the blade is spinning at full speed.
4. Make the Cut
As the material is being cut, you should carefully slide the entire miter gauge and the material forward slowly as the blade is moving. The miter gauge should stay on the material the whole time.
In Conclusion
Using a table saw is pretty straightforward, but it can result in injury if you aren’t careful. You should take a few safety precautions anytime you’re using a table saw. For instance, you should never allow the blade to touch the material until it is on and at full speed. Otherwise, the material will kick back and may cause injury.
However, if you keep all these safety guidelines in mind, you likely won’t have anything to worry about. Slow and cautious is the name of the game with these machines.
Featured Image Credit: Tima Miroshnichenko, Pexels
Contents
