
Eyelet pliers are small handheld tools that will help you press eyelets into shoes or clothing. Although these devices are relatively easy to use, they might not be as intuitive as other devices.
In this article, you will learn all the top tips and tricks for using an eyelet plier like a pro. Let’s get started.

Why Use Eyelet Pliers
Eyelets are designed to reinforce a hole in a piece of clothing. Without an eyelet, the fabric can stretch and get torn prematurely. That’s why it’s essential to place eyelets around holes or tears in your material.
Eyelet pliers just make the job of installing eyelets a bit easier. The tool will ensure that you have a clean finish that looks professional and gets the job done. Although you can insert eyelets without an eyelet plier, the job will be a lot more difficult.
What You Will Need
In order to correctly install eyelets, you will need the following materials:
- Material
- Scissors
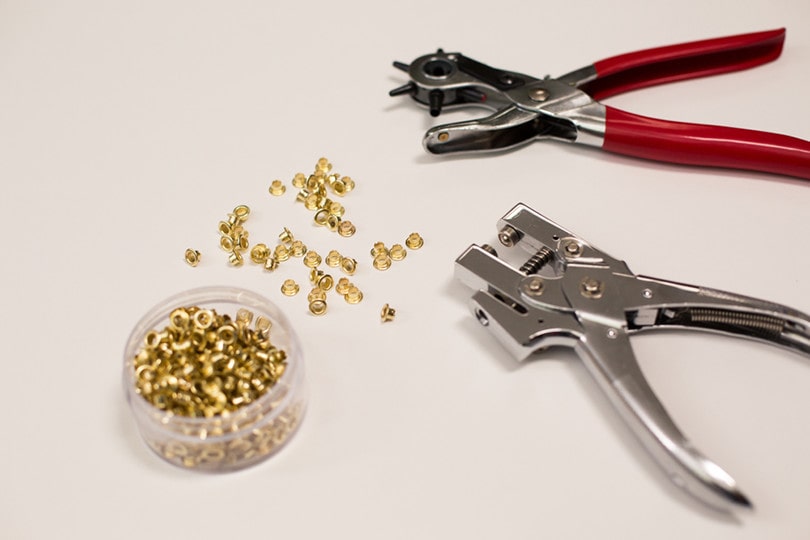
- Eyelets
- Eyelet pliers
The 6 Steps to Using an Eyelet Plier
1. Grab a Pad
The first thing you need to do is grab a pad that you will place underneath the material. The purpose of this pad is to create an even finish around the cut surface. An acrylic block, hard leather, or some other hard surface will do.
2. Turn the Material Inside Out
Next, turn the material inside out or flip it upside down. You always want to cut on the side of the fabric that you will not see. That way, the worn side of the fabric looks clean and professionally done.
3. Cut a Hole in the Material
Finally, it’s time to actually cut the holes you have been prepping for. Make sure that the hole is just big enough to get the eyelet through. If it is too big, the eyelet will simply fall out.
4. Push the Eyelet Through
Now, push the eyelet through that hole from step three. You will want the flat side of the eyelet to be on the good side of the fabric. Make sure to tuck away any loose threads that are visible from the good side so that the finish looks clean.
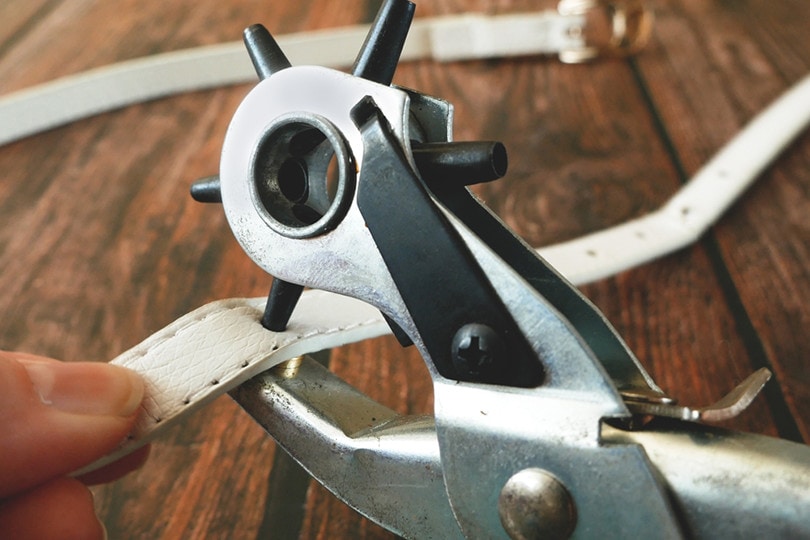
5. Align and Squeeze Eyelet Pliers
It is time to use your eyelet pliers now. Line the eyelet pliers over the good side of the eyelet. You will want the good side to sit in the curved part of the pliers while the bad side is aligned with the pointed end. Squeeze the pliers together once they are aligned.
6. Double-Check and Correct
The last thing you need to do is double-check your work. See if the eyelet is set where you want it. You can rotate the material or repeat steps as needed. Once the eyelet appears desirable, you have finished the job.
 Frequently Asked Questions: Eyelet Pliers
Can I use eyelet pliers for grommets?
No. Grommets technically have a larger diameter than eyelets. Eyelet pliers are specifically designed for the diameter of eyelets. You will need to get a different size plier to match the size of the grommet you are using.
Is it possible to make an eyelet hole in a canopy made from polyester fabric?
Yes. You can make an eyelet hole in a canopy made from polyester, but you will need to reinforce the polyester before you make the hole. Reinforcing the material ensures that the cut threads do not unravel.
What can I use if I don’t have eyelet pliers?
If you do not have eyelet pliers, you can use needle-nose pliers to push the edges down. Then, flatten the eyelet down by hammering it over a hard surface. This method is efficient, but it will take longer than if you used eyelet pliers.
Conclusion
As you can see, using eyelet pliers is actually very simple. As long as you’re careful in cutting the hole and positioning the pliers correctly, the only thing left to do is squeeze.
- See Also: 8 Best Interior Design Books
Featured Image Credit: LanKS, Shutterstock
Contents
