7 Clever & Creative DIY Craft Room Organization Ideas (With Pictures)
-
Melissa Gunter
- Last updated:

A love for crafting can often feel like an addiction. Each time you’re at the store, you buy supplies. When you aren’t crafting, you’re thinking about what you can do next. If you aren’t in your craft room, you want to be. Unfortunately, all this obsession can also lead to a craft room that is full of clutter and nearly impossible to muddle through. We’re here to help you out and make things easier. Here are a few clever and creative craft room organization ideas you can do yourself. In no time, you’ll have your room looking more organized and feeling like the oasis it was intended to be once again.
The 7 DIY Craft Room Organization Ideas
1. DIY White and Bright Pegboard Organizer by White House Black Shutters
| Materials: |
Pegboard, decorations of choice, wire baskets, pocket organizer, rolling cart, and desk of choice
|
| Tools: | Drill, mounting hooks, pegboard hooks |
| Difficulty Level: | Medium |
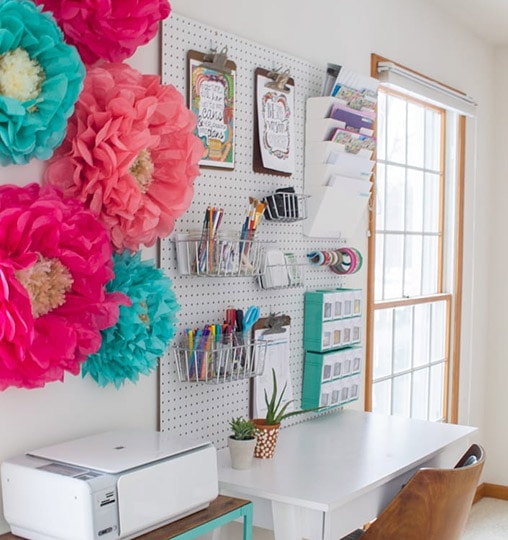
This white and bright pegboard organizing scheme for your craft room is a cute and easy idea to get things where they should be with minimal work. By grabbing yourself a desk, if you don’t already have one, a rolling cart, a pegboard, a few wire baskets, and other organizing trinkets you want in your space, you can decorate your craft room to your preference then use your pegboard for the majority of your materials. This helps keep items off the floor and provides a good workspace for when you’re feeling creative.
2. DIY Craft Paint Storage Box by Remodelando la Casa
| Materials: | Wine boxes, ruler, and paints |
| Tools: | Clamps, router, saw, sandpaper, glue, nailer or hammer and nails, |
| Difficulty Level: | Hard |
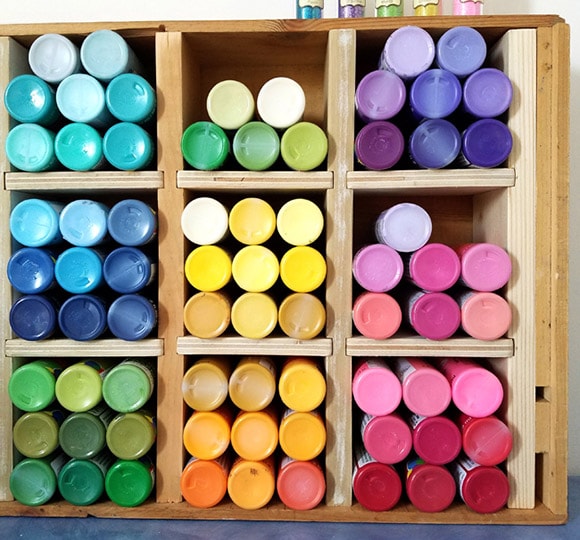
If you use a lot of paint for your crafts, this craft paint storage box is the perfect way to organize your room. This DIY is a bit more difficult as you need to do a bit of sawing and nailing, but with enough dedication, you can easily repurpose any old wine box into this creative and useful storage shelf. If paints aren’t your thing, several other supplies in your craft room could easily fit into this box.
3. DIY Thread and Bobbin Organizer by Crafty Little Secret
| Materials: | 2/12 inch nails, 12” X 36” board, pencil, and measuring tape |
| Tools: | Hammer |
| Difficulty Level: | Easy |
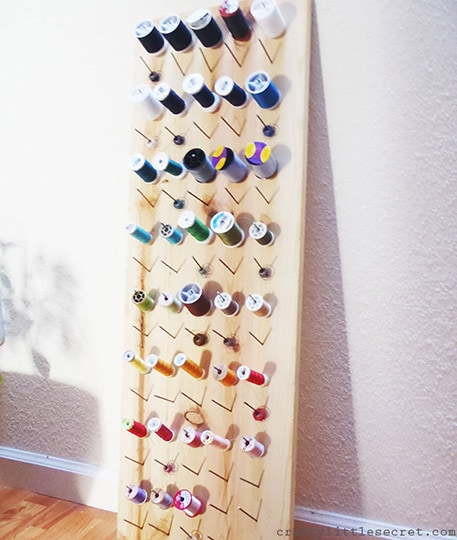
For those who enjoy sewing or making crafts using thread, this thread and bobbin organizer is a quick and easy way of storing your spools without a lot of mess. Instead of tossing your thread into a box where you need to dig for the right color, simply hammer a few nails into a board to make the perfect holders. You can even hang this organizer on the wall if you have the space.
4. DIY Embroidery Floss Pins by Heather J’s Life
| Materials: | Clothes pins and embroidery floss |
| Tools: | None |
| Difficulty Level: | Easy |
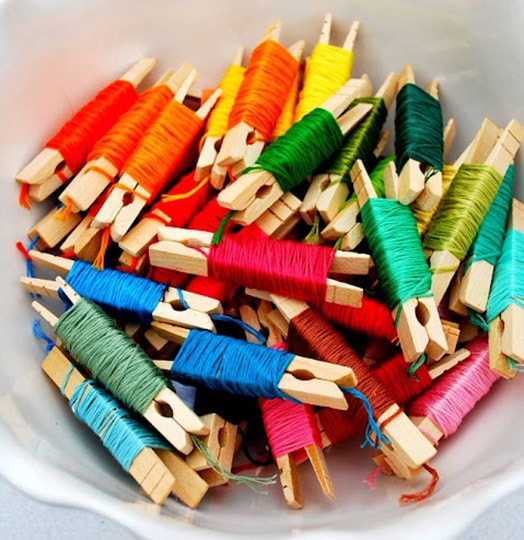
These embroidery floss pins are the perfect way to wrap up all that extra thread and keep it organized. Gone will be the days of tangles with this DIY. There aren’t any tools involved. All you need is a pack of clothespins and a little time. Once you finish, you can toss your floss into a bowl, or a storage container, or get bold and hang them from a pegboard so you can grab what you need easily.
5. DIY Simple Washi Tape Storage by Scattered Thoughts of a Crafty Mom
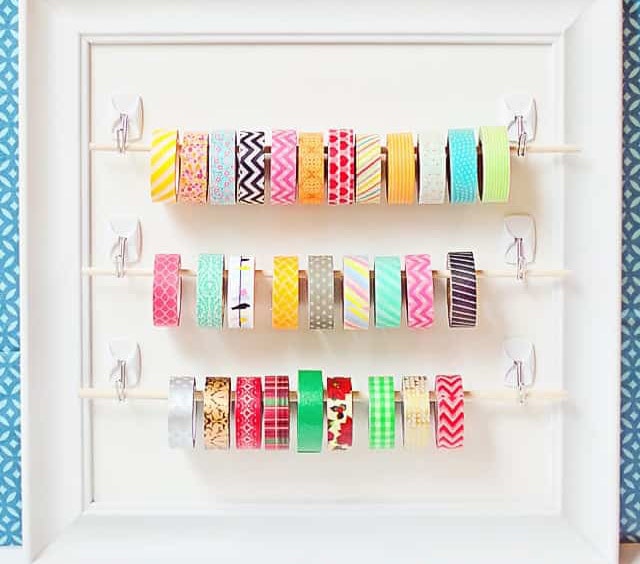
| Materials: | Wire-hinged Command hooks, 12-inch dowels |
| Tools: | None |
| Difficulty Level: | Easy |
If you’re a fan of washi tape, this simple washi tape storage DIY is for you! There are no tools required. All you need is wire command hooks, 12-inch dowels, washi tape, and a spot in your craft room to hang it. Simply place the command hooks the appropriate length apart, slide the tape on the dowels, then hang them up. Cute, fun, and simple!
6. DIY Mason Jar Storage Shelf by Poofy Cheeks
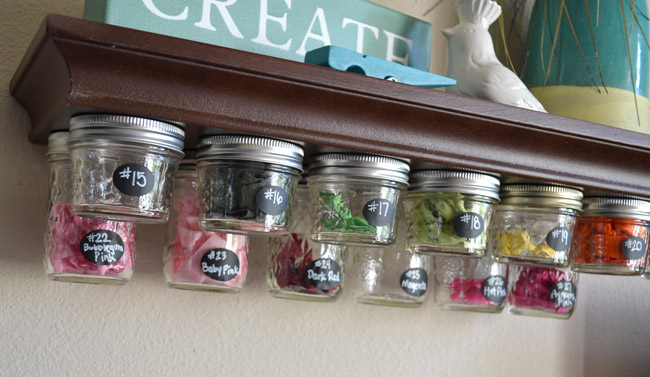
| Materials: |
Shelf with a flat bottom, Mason jars and lids, screws, chalkboard labels
|
| Tools: | Drill |
| Difficulty Level: | Medium |
If you have small items floating around your craft room, this Mason jar storage shelf is the perfect way to get it all organized. Once you have a shelf mounted, you can take it down and position the lids of your Mason jars where you want them. You can use whatever size you need for this tutorial. When the lids are drilled in, place your items in the jar then screw them on. When you put the shelf back up, you’ll have plenty of things stored away underneath leaving you the top to work with.
7. DIY Framed Pegboard Organizer by Honeybear Lane
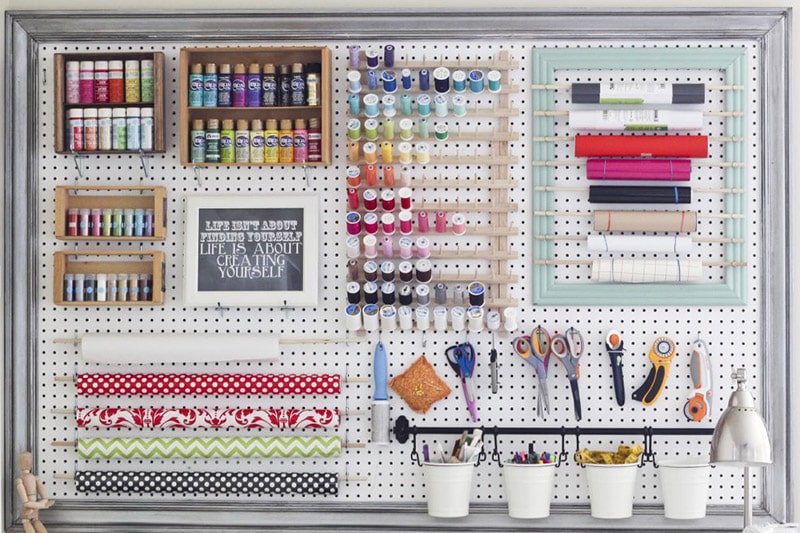
| Materials: | Pegboard, picture frame, and mounting hooks |
| Tools: | Drill |
| Difficulty Level: | Easy |
If you truly want to organize your craft room, this framed pegboard organizer is the perfect way to do it. By grabbing yourself a pegboard, framing it, and then mounting it to the wall of your craft room you can let your creative juices flow. By popping by your local discount store you can buy additional hooks, caddies, dowels, and other neat things to use on your pegboard and clean up your space.
Another Craft Room Tip
While it doesn’t take a lot of DIY skills to do it, you can also help organize your craft room by using creative storage options from your local stores. This can be done on a budget as well. Simply stop by your local Dollar Tree or Dollar Store to grab cute jars, stylish containers, or even totes you can use to toss your spare materials in. With a bit of creativity, you can add these items to your DIY projects to get even more use out of your projects and the space inside your craft room.
In Conclusion
These are a few of the DIY clever and creative craft room tricks to get things organized around your home. If you love crafts but had no idea what to do with all your supplies, now you do. Implementing a few of these hacks into your craft room will liven things up while also opening up more space for you to do the things you love.
Featured Image Credit: DevilsApricot, Pixabay
Contents
