

Does your flooring seem to serenade you wherever you go? Or does it wait until you find the one special spot before singing you the song of its people? If you’ve got a squeak spot in your house or an outright squeaky floor altogether, it can be quite a nuisance.
Fortunately, we’ve got a set of highly practical steps you can take to (hopefully) tackle the squeak in the floor. Let’s take a look at some things you can try yourself and perhaps avoid paying for a simple fix you can DIY.

How to Fix the Squeak in the Floor
1. Find the Squeak
For the more proactive homeowner who is out to find squeaks rather than wait until they call you, it’s just a matter of walking around and testing the floor. If you aren’t heavy enough, get a larger friend to help you out.
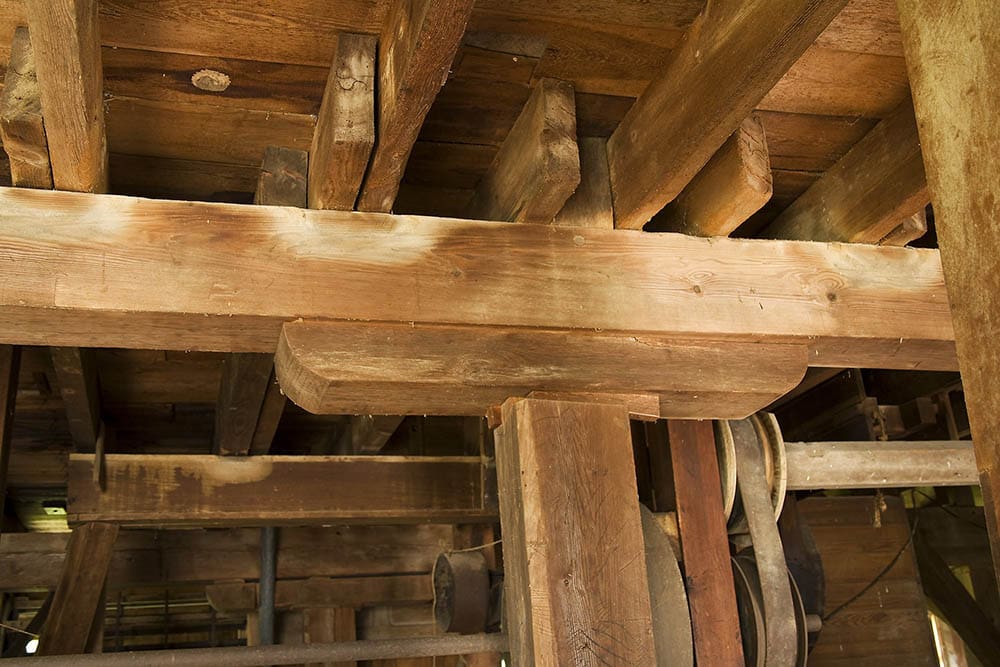
This is a good time to discuss the makeup of the floor. Depending on the build of the house, the subflooring or plywood layer that is underneath the finished floor, typically either sits on concrete or on joists. Not every floor built on concrete has a subflooring layer, although they ought to, and often concrete subflooring is in strips called ‘sleepers’ rather than full sheets.
On top of the subfloor sits the underlay—usually made of foam, unless the floor is tile. This affords the flooring a little bit of ‘give’. On top of that is the final layer that you see, your carpet, hardwood, laminate, and what have you. Understanding the different parts of the floor will help with the next step.
2. Determining the Cause
In this article, we’re going to be focusing more heavily on floors that are joist mounted. This is simply because there are more options available to repair joist-mounted floors that doing involve removing the finished flooring. So, what makes a floor squeak?
Movement is generally the culprit. As time goes on and floors bear a load of people and furniture traveling over them repeatedly, the glue and screws or nails which hold the subfloor to the joists start to give a little bit. As movement and subsequently rubbing occurs, we get squeaking. This is also commonly found to happen at the fasteners—especially if a nail didn’t go in straight or hit the joist too close to the edge.
Often, when the nail or screw hits too close to the edge, it chips off over time. This is due to the expansion and contraction that occurs in different temperatures and humidities. In older homes, the singing floors can even be due to the joists sagging. The key thing to look for is gaps.
Anywhere that wood should be touching, and isn’t, is going to require further investigation. Once you think you’ve found the reason for your squeak, skim below to find the right solution, or read this right to the end to find out what to do.
3. Shim the Joists
If there are any gaps between the joists and the subfloor, then try tapping in some wooden shims. If you aren’t familiar—these are simply long, slim wooden wedges. Don’t hammer them in too far or you’ll put a bump in your floor. You only want to fill the gaps nicely and snugly, but not move anything elsewhere it can be avoided. After that, hit the shims with some construction adhesive, or the wedge will simply work itself back out over time. Let that dry and cut the excess shim off at the edge of the joist.
4. Repair Sagging Joists
This is more common a problem in older homes. If a joist is sagging, you’ll want to take a long 2×10 or 2×12 and secure it to the joist side by each. Be sure to run some construction adhesive along the length of the board—a liberal amount. Next, you’ll need a 2×4 that is cut at a length roughly ¼-inch longer than the distance between the bottom of the joist and the ground.
Take that piece of 2×4 and try to hammer it in vertically between the joist and the floor below, to take the sag out. Once the 2×4 has been loaded up with pressure from the joist, you can finish fastening the brace to the joist.

5. Use a Squeak Ender
Where the problem is between the joist and the subfloor, it is also worth noting some brackets are specially designed to help. These have a lip that fixes to the bottom of the joist and a guide for a screw. The screw goes up and sucks the two pieces together. It’s a pretty handy little bracket.
6. Construction Adhesive
Sometimes, it is helpful to simply run more construction adhesive along the edges between the subflooring and the joists. While it might seem pointless to just ‘glue’ them like that, construction adhesives such as ‘PL’ harden very strongly. If it isn’t a huge gap, then this can often solve the problem quite easily, so it’s worth a try. Sometimes, however, the problem isn’t between the subfloor and the joist— it’s just in the joist. That’s when it’s time to put our carpenter hats back on.

7. Blocking
Sometimes how the load is distributed from the floor to the support can cause the joist to twist and squeak at the top. In this case, we cut blocks of lumber at the same width as the joist. These must be cut snugly to just a sliver of an inch larger than the space between the joists. The idea here is to put just a little bit of tension in the joist, so that it stops moving and hence, ceases singing.
8. Bridging
Bridging is essentially the same concept as blocking, except it works slightly differently. Blocking deals with the whole beam of the joist. When the same problem is occurring, but it’s only the bottom board that is wiggling side to side, we use bridging that connects the bottom of the joist to the top of the one next to it. This follows the almost same procedure as blocking, except you need to put more boards in between the spaces to reinforce it, as bridging doesn’t block up to the subfloor.
9. Screw Subfloor from Below
If you’re comfortable putting in a toe screw, then you don’t necessarily need a squeak-ender to use a screw to fix a squeak. You can also combine these methods. For example, shimming and screwing are essentially the same thing as using a squeak ender for a larger gap. If the space is smaller, however, use a short enough screw and screw it up into the subfloor to tighten up the fit.
10. Screw Down from Above (Carpet)
Carpet flooring presents a unique advantage. If you are comfortable pulling the carpet back, then you can simply use a stud finder and re-screw the joists from above. It might be a bit more work, and sure, it technically involves pulling the flooring up. However, in the case of carpet, this can save you from risking punching a hole up through your floor, so it may be worth considering.
11. Finishing Nails and Pilot Holes from Above
If you have finished hardwood and want to try renailing the studs from about, you can, but it takes a great deal of care and concentration. To avoid splitting the flooring you need to drill pilot holes first—these are holes just shy of the diameter of the finishing nail, so they should still be snug when you tap in the nails. Make sure you are careful and use a hammer with a finishing (smooth-faced) head on it.
12. Lubrication
Hardwood floorboards are often the culprit of squeaky floors. The good news is, they don’t need to be removed to be remedied. You can treat a squeaky floorboard with a nice big helping of graphite, talcum powder, or powdered soapstone. Cover the squeak in the powder of your choice, then place a towel on top and step on it. This works the powder in and helps prevent squeaking. This might take a couple of tries, but it’s a great fix.
13. Humidifier
If you have inspected, shimmed, lubed, and exhausted all other avenues of attack only to still hear the pesky, incessant squeaking, it might not be the floor. Well, it’s the floor that is squeaking, but it might be due to a lack of humidity. If you notice that the squeak comes around when it gets drier, and disappears when it’s more humid, then one solution may be a humidifier for the dry season.
- See Also: How to Fix a Squeaky Door in 4 Steps
Conclusion
Squeaky floors sure can be a pain, and there are hundreds of reasons they happen and remedies to fix them out there. We hope this guide will serve you well and wish you the best of luck in quashing that squeaky floor!
Featured Image Credit: Neven Krcmarek, Unsplash
Contents
