

When it comes to painting a bathroom, there are few more troublesome and challenging areas than behind the toilet. Not only does it mean putting your head near the bowl but the close proximity of the toilet to the wall makes it very difficult to get behind and do a decent job.
All toilets are challenging to paint behind, although corner toilets are the worst because there is no room at all to get behind. Even if you do manage to get behind, it’s not uncommon to end up with paint on the toilet itself. Whether you end up leaving the area behind the toilet unpainted, or you have paint splodges on the toilet seat and cistern, it will look like an unprofessional job. Fortunately, there are some steps you can take to help improve your toilet painting results.
Below, we have outlined 7 simple steps to help you get decent lavatorial coverage: paint where you want it and none where you don’t. We’ve also included a list of the equipment and materials that you will need, so you can go into the job fully prepared.

Preparation
The bathroom can be a crowded space, especially if you are painting a closet toilet room. In any case, you need to be prepared before you start the painting. Get your equipment together, ensure that you’re wearing suitable clothes. Cover the floor in cloths and place a trash bag over the top of the toilet. When painting any room, it is important that you have adequate ventilation because paint fumes can be dangerous. Open a window, leave the door open, and wear a mask if necessary.
Materials And Equipment
Bathrooms tend to be moist, can get very warm and humid, and they are also a breeding ground for bacteria. This means that you will want to find a suitable, high-quality paint. A high gloss paint can be a good choice because it is easier to clean, while using a primer under the paint will also help ensure that the paint adheres and doesn’t just slip off the walls.
You will need:
- Angled paint brush
- Drop cloths
- Mini roller
- Paint
- Painter’s tape
- Primer
- Roller pad
- Small detail paint brush
- Trash bag
The Process
The exact method you will use to paint behind the toilet depends on the amount of clearance there is between the tank and the wall and whether the tank and bowl are separate units or attached. Below are instructions to help you get the done, including three different methods that you can use.
1. Prepare the Room
Before you can even start painting, you need to prepare the room. This means opening a window to allow for ventilation. Put down drop cloths. Drop cloths shouldn’t be loose. If they are too loose, they can be a trip hazard, and if you spill a drop of paint on a wrinkled cloth, it gets in the folds and can quickly transfer to the floor and other surfaces. Use a trash bag and tape it over the toilet to prevent any paint spills from ruining it.

2. Clean the Wall
Before painting, ensure the wall is clean. Get rid of any dirt and debris and use a damp cloth to clean the surface properly. If you paint over dirt, it will become entrenched in the paint, and you won’t be able to get rid of it. It can also prevent the paint from adhering and eventually cause the cracking and peeling of more paint. Once cleaned, allow the wall to dry before painting. If you paint on a wet wall, the paint will run.
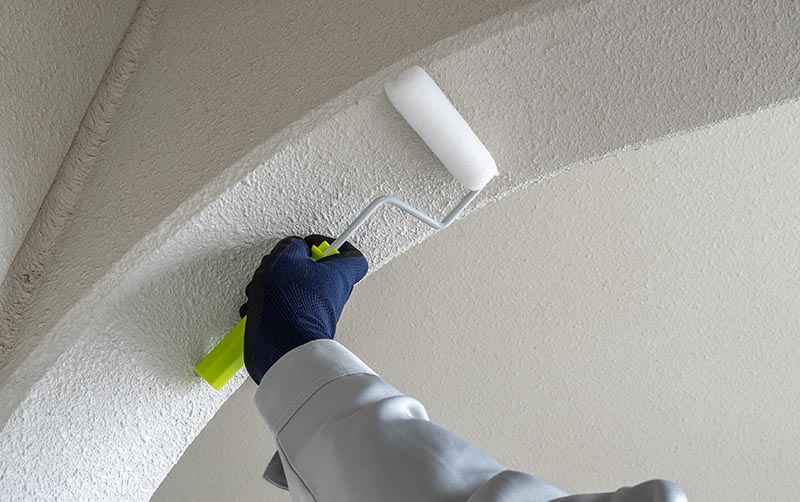
3. Paint with the Mini Roller
Start by trying a mini roller. Mini rollers are designed for the exact purpose of getting into tricky spots and tight areas. Try to find one with a 16” neck, which is quite standard, and a 4” pad. You can use a standard roller tray, place paint in the tray. Ensure the roller is covered but not dripping and paint as evenly as you can.
In most cases, the mini roller should be able to reach all of the wall behind the toilet, enabling you to finish the job. However, there might be some toilet designs, especially corner toilets and those where the tank sits very close to the wall, where it isn’t possible. In these cases, you might have to get creative.
4. Use a Paint Swipe
A paint swipe is, essentially, a homemade item that allows you to swipe paint on the walls rather than brush or roll it on. It consists of a long stick or stick-like object with a rag or pad on that is used to transfer and then apply the paint to the wall. Use a really thin piece of wood and wrap a clean, thin piece of rag around the end of the stick. Dip the stick in the roller tray and cover one side of the rag with your paint. Now, just insert the swipe behind the toilet and wipe it up and down the wall.
You won’t get the best-looking paint job using this technique but it will look better than leaving that section blank and it may be your only option.
5. Remove the Tank
If the roller and the swipe didn’t work, you may have to remove the tank from the wall. If the tank isn’t separate from the rest of the toilet, do not remove it. If the two are separate, turn off the water to the toilet, typically done using a valve on the wall behind the toilet. Once the water is off, flush the toilet to empty the tank. Find the plastic bolts and nuts, unfasten them, and lift the tank slowly out of place.
Once the tank is removed, you can paint the wall, allow it to dry completely, and then replace the tank.
6. Second Coats
If you have to apply a second and subsequent coats, allow the first coat to dry according to the instructions on the tin. This usually means leaving the paint for at least 6 – 8 hours, ideally overnight. Once dry, you can apply a second coat in the same way as you did the first.
7. Clean Up
Always ensure that you clean up after you’ve painted. If you leave rollers, roller trays, or even a drop cloth that has a drop of paint on it, in the bathroom, you run the very real risk of getting paint on the floor or causing a mess.
Conclusion
In all honesty, nobody is really going to be looking behind the toilet, which is why a lot of people don’t bother painting back there. However, if you want to a full and complete job, then you will need to use a roller, a home-fashioned paint swipe, or, as a last resort, you may need to remove the tank so that you can get in and paint the wall behind the toilet.
Featured Image Credit: Point3D Commercial Imaging Ltd., Unsplash
Contents
