
Whether your tiles are just starting to fade or if you want to change the color to keep up with current styles, you’ve come to the right place. We walk you through everything that you need to know about painting tiles.
While it takes a while to do, once you have everything that you need, it’s a straightforward process. Just keep reading, so you can decide if it’s something that you want to take the time to tackle!

What You’ll Need
The last thing that you want is to get halfway through the job and then need to make a trip to the store to get more supplies. That’s why we highlighted everything that you need right here:
- Paint roller
- Paint brushes
- Paint tray
- Paint liner
- Sander/sandpaper (150 grit)
- Scouring sponge
- Disposable gloves
- Eye and breathing protection
- Putty knife
- Bucket
- Tile paint
- Primer
- Sealer
- Trisodium phosphate (TSP)
- Tile caulk
- Grout
- Grout pen
- Painter’s tape
 How to Paint Tile in 9 Easy Steps
Now that you have everything that you need, it’s time to get started. This is a lengthy project, so ensure that you have plenty of time blocked off to do the job right.
1. Clean the Tile
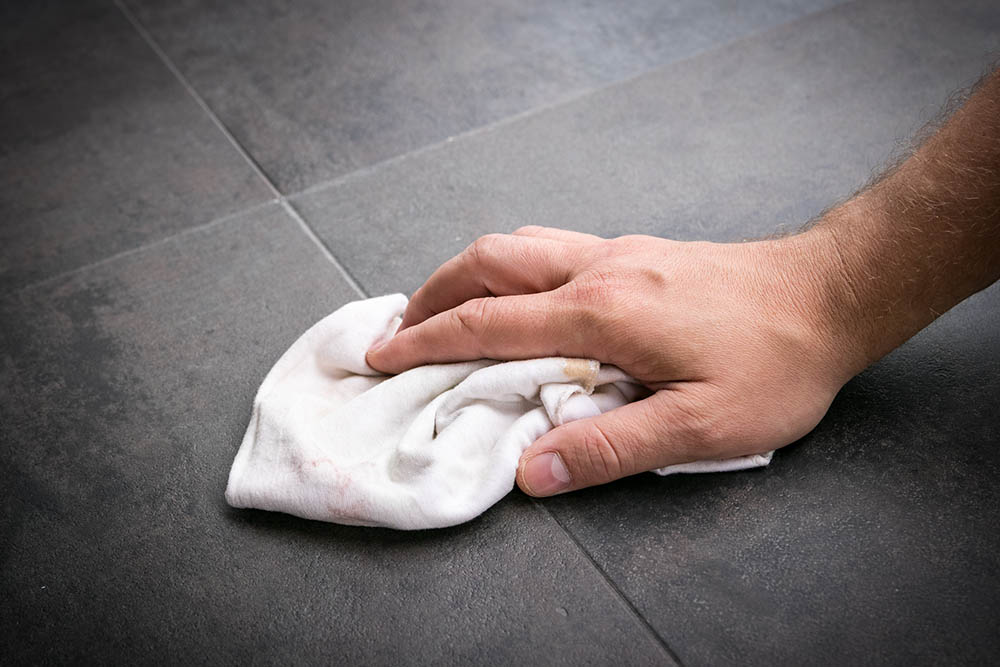
You don’t want to work on a dirty surface. Not only is it unhygienic, but it’s going to make the entire job much harder. The good news is that it’s not as hard to clean tiles as you might think. Get trisodium phosphate (TSP), and mix 1/4 cup with 1 gallon of hot water.
TSP is a strong cleaner, so ensure that you’re wearing respiratory protection, gloves, and eye protection when you’re preparing and using the solution. If you’re working on a tile wall, start at the top. If you’re on a floor, start at the farthest point back.
Clean all the tiles, then rinse them off with clean water and let them dry. Keep in mind that TSP is toxic, so keep kids and pets away from it. If you can’t buy TSP in your area, use another industrial-strength cleaner for this step.
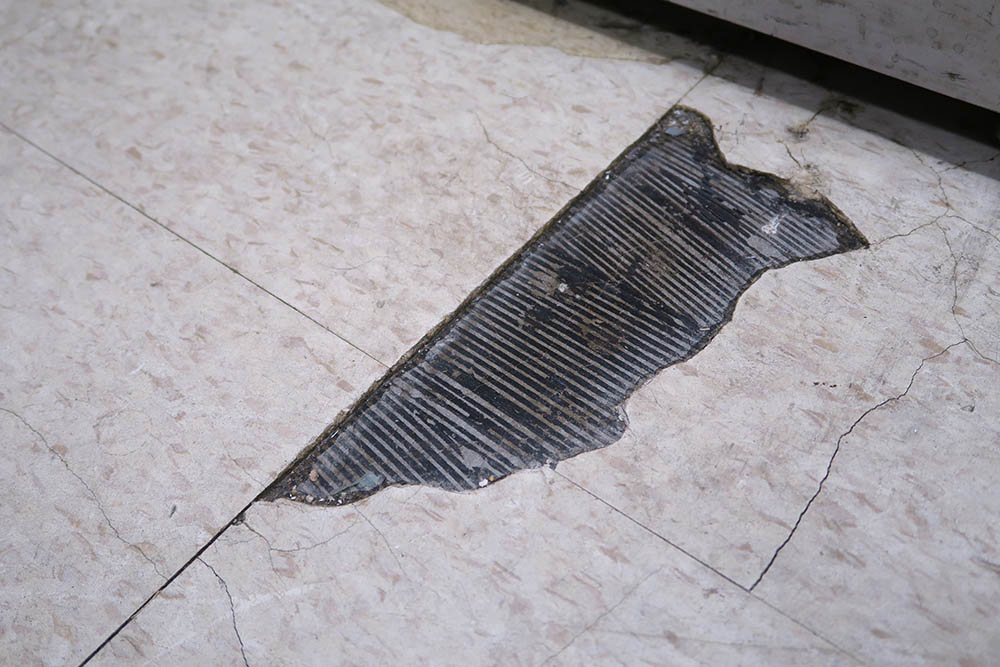
2. Repair Chips and Cracks
This is the perfect time to repair any cracks or chips that you see in the tile. Get a new pair of disposable gloves, and apply caulk to the cracked or chipped tiles.
Level it out with your finger, and then give it time to dry. It depends on the specific caulk that you’re using to determine how long that will take, but typically 30 to 60 minutes is long enough to continue to the sanding step — although it takes longer to become completely waterproof.
The caulk isn’t going to blend in with the tiles at this point, but that’s fine because you’ll be painting them soon.
3. Repair the Grout
You want a flawless final product, and a critical part of that final appearance is the grout. Fortunately, repairing grout is a simple and straightforward process. Simply take a little grout, put it on a gloved finger, and press it across the damaged area. Wipe it down to the desired level and give it time to dry!
4. Sand It Down
After the caulk is dry to the touch, it’s time to move on to the most time-consuming task of the entire project. For this step, we highly recommend using an orbital sander to speed up the process, but it’s not completely necessary.
When you’re sanding the tile, all you want to do is scuff up the glaze a bit. If you sand off the entire glaze, you’ll end up with fragile tiles, and you’ll have a ton of chips, cracks, and breaks before long.
By scuffing up the glaze, you’re creating an optimal surface for the paint to stick to, and you’re not damaging the long-term durability of the tile.
After sanding the tile, wash everything down with clean water and dry it off before moving on to the next step.
5. Tape Everything Off
Before you paint anything, you want to ensure that you’re not going to accidentally paint areas and things that you don’t want to. Tape off any surfaces that are directly adjacent to the areas that you’ll be painting.
6. Use Primer
If you want the paint to stick and last, you need to use a primer. Some paints have primer mixed in, but if the paint that you’re using doesn’t have it, you’ll need to purchase a separate primer.
Apply the primer to the tiles using a paint roller, and give it between 1 and 4 hours to dry before applying a second coat. Let the second coat dry for 1 to 4 hours, then move on to painting.
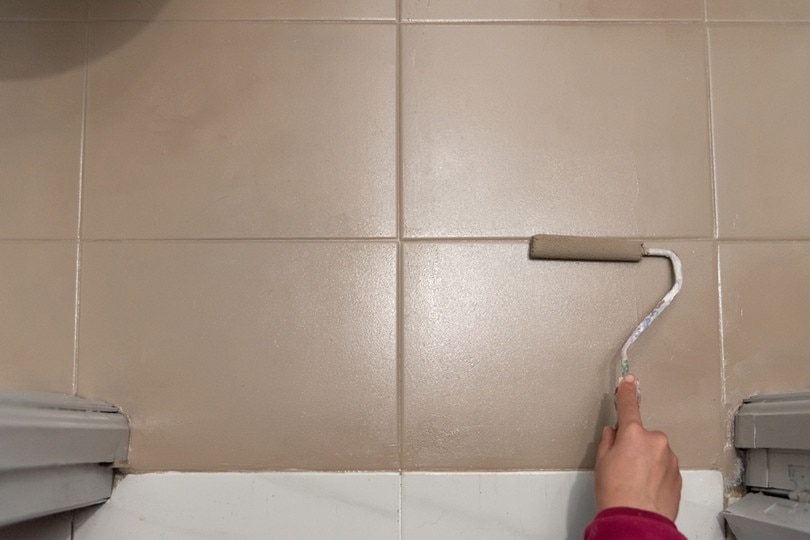
7. Paint!
After priming, it’s time to paint! You apply the paint in the way that you applied the primer, but use a paintbrush to touch up areas that you can’t get a smooth finish on with the roller. Let the first coat cure, then inspect the area.
If you see streaks or don’t have a solid coat throughout, apply a second coat. Continue this process until you have a uniform appearance throughout.
8. Use a Grout Pen
Once you have a uniform appearance and the paint is dry, go over the grout with a grout pen. This is an optional step, but if you want a separate color for the grout, it’s one that you’ll need to do.
9. Don’t Forget to Seal
The final step is to seal the tiles using a polyurethane sealer. This protects all your hard work and ensures that scratches, chips, and other damage from wear and tear won’t show up for quite a while.
What Kind of Paint Do You Use for Tile?
If you just finished painting your walls and are wondering if you can use your excess paint for tiles, you’re out of luck. Tiles require a special type of epoxy paint; otherwise, it won’t stick and give the final appearance that you want.
Epoxy paint or tile paint is what you need to look for at the hardware store. These paints are both waterproof and durable, making them ideal for tile work.
When Painting Tiles, Do You Paint the Grout?
When you’re painting tiles, it’s best to just roll right over the grout. While you will have to go back over it with a grout pen, it’s far less work than trying to paint each tile individually while skipping the grout.
So, paint right over the grout, and if you want the original grout appearance, just go over it with a grout pen!
Final Thoughts
While it’s a time-consuming task, painting tile can completely transform the appearance of a room for a fraction of the cost of replacing the tile. Hopefully, our guide has given you the confidence to tackle your own tile-painting projects and give your room a whole new appearance!
See Also:
Featured Image Credit: kepazuria, Shutterstock
Contents
