

Popcorn ceiling was once the thing. However, it has dropped out of style over the last couple of decades or so. Still, you’ll often find it in older homes. For those looking to modernize their home, popcorn ceilings are often one of the first things to go. Popcorn ceilings, also called stipple ceilings or acoustic ceilings, were and are a popular ceiling type from the ’60s through the present, especially in the United States. The ceiling type is almost always bright white. Popcorn ceilings hide underlying imperfections or minor damage in the drywall and defeat echoes due to the irregular surface, making them sound-deadening, a desirable characteristic in many ceilings.
There are downsides to popcorn ceilings. Older ceilings from the 1980s and earlier were often made using white asbestos fibers. Damage from impact can cause these fibers to be released from the ceiling into the air, which can lead to lung damage. Later ceilings use Styrofoam or paper for texture but still suffer from dust and allergen retention. Popcorn ceilings are virtually impossible to clean well, and matching texture after a repair job is extremely difficult compared to smooth surfaces.~
Sadly, getting rid of it is not as easy as you’d like. While the process is simple, this stuff was not made to come off easily. You’ll probably have to work on it over a period of days simply due to the strain it puts on your shoulders. Below, we’ve put together the easiest and fastest way to remove popcorn ceiling.

Asbestos: What You Need to Know
Before continuing, it is critical to know whether the popcorn ceiling that will be removed contains asbestos. If the ceiling was applied in the 1980s or earlier, or there is no sure way to know when it was applied, the homeowner will need an EPA-approved asbestos test kit.
If the results of the test indicate no asbestos, excellent! The project can continue as a do-it-yourself situation. If the results indicate there is asbestos, full stop. Asbestos should only be removed by qualified professionals due to the irreversible damage it can do to the respiratory systems of those that inhale it. Do not attempt to remove an asbestos popcorn ceiling as an amateur or on a do-it-yourself basis.
Tools and Materials
First things first: Gather the tools and materials needed to remove the popcorn ceiling safely and without causing damage to the drywall underneath. The project will require the following:
Ladder
A stepladder is ideal if the ceiling is short enough and the homeowner is tall enough. Get one that is stable, easy to stand on for long periods, and consider having a partner to help hand things up and down and stabilize the ladder if needed. This will make ladder use safer.
If the ceiling is tall enough, the project may require a larger utility ladder. Here, a partner is even more ideal. The ladder will be large, heavier, and harder to move, and going up and down is more likely to lead to a fall. For very tall ceilings or large rooms, moveable scaffolding is ideal. Scaffolding has rolling casters that can be locked in place, is relatively easy for one person to move around, is easy and safe to climb due to increased stability and has a large working area where more tools and materials can be kept at hand.
Water Spray Bottle

A spray bottle is optional. Depending on the type of popcorn ceiling being removed, the paint or surface replacing it, and the scraper being used, it may help to moisten the popcorn surface before scraping. If spraying is used, it will be helpful to have a large spray bottle with a nozzle that can be set to atomize the water into a fine mist.
Drop Cloths
Drop cloths are ideal to cover furniture or fixtures that cannot or will not be moved during the removal process.
Plastic Sheets
Get enough plastic sheeting to cover the entire floor, walls, counters, and any other surfaces. Anything left exposed will get covered in the scraped-off popcorn!
Painter’s Tape
Use painter’s tape or masking tape to seal down the plastic sheeting so it doesn’t shift.
Scraper
The project may require a few scraping tools. Large scrapers with long handles are great for reaching from the floor or a shorter ladder, which is safer. A putty knife or smaller handheld scraper is ideal for working around edges and small areas.
Safety Gear
It is best to wear goggles and a mask. Ceiling work requires looking up at the ceiling, and old popcorn ceilings collect dust that will be dislodged along with the popcorn particles.
Joint Compound
Also called spackle or DAP, this will be used if the scraping process causes any divots or dents in the underlying drywall.
Sander
A sander or sandpaper is required to even and roughen the surface of dried spackle or joint compound after they dry.
Paint Brushes or Rollers

Paintbrushes or rollers will be used to apply the new ceiling paint or texture.
Painting Tray
Painting trays are used to hold the new paint or texture before application.
Primer
If the paint or surface replacing the popcorn ceiling requires it, a primer should be purchased.
Ceiling Paint
The new ceiling color and/or texture. Make sure to get enough primer and paint to cover the entire ceiling!
How to Remove Popcorn Ceiling (7 Steps)
1. Remove Everything
Your first step is to remove absolutely everything from the room. When you remove the popcorn ceiling, all the tiny pellets will end up on the floor. If you have furniture, you’re going to be picking it off the furniture for years to come.
To avoid cleaning later, do yourself a favor and remove all of the furniture from the room. If something is too heavy to be removed, be sure to cover it in plastic.
2. Cover the Floor
Next, you’ll want to cover the floor with something that will make the cleanup process easier later. You can use a canvas drop cloth, which is the professional option. However, several pieces of plastic overlapping are also a decent option. Be sure to tape it together to prevent the chance of leaking, though—you want to remove all of the popcorn in one fell swoop, not be picking it up off the floor for months.
3. Check for Asbestos
If the ceiling was coated before 1979, then you need to have it checked for asbestos before continuing. This stuff can seriously mess with your health, but it was used widely in construction before this period.
A professional will need to remove the ceiling if it tests positive for asbestos.
4. Spray Down the Ceiling
Now that you’ve prepped everything, it’s time to actually get to removing the popcorn ceiling. First, you’ll want to use a portable hand sprayer to spray down the ceiling with water. Only do a small portion at a time, as you’ll need to remove it when it is wet. If you spray down the whole ceiling, most of it will dry by the time you get to it.
The popcorn ceiling is very porous, so it will soak up a lot of water. Don’t be afraid to absolutely soak it.
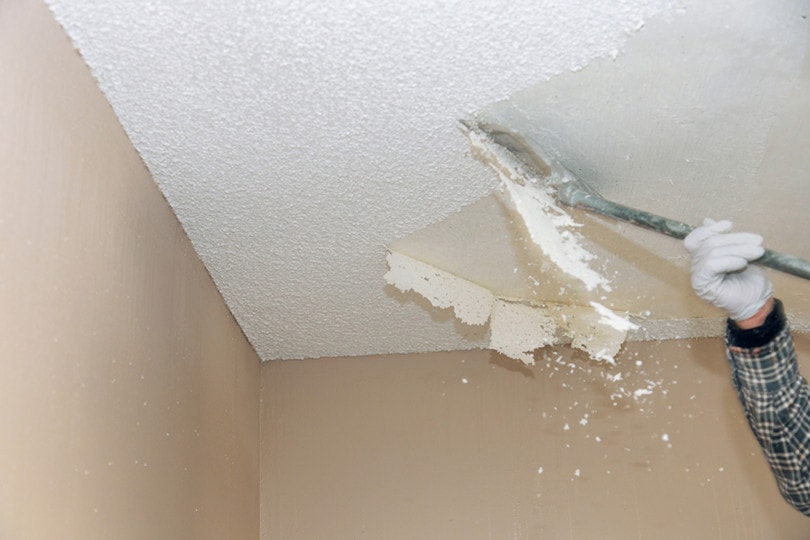
5. Use a Scrapper
Let the popcorn ceiling soak up as much water as possible. Then, get on a stepladder and start scraping it off with a scrapper. This is the part that will take the most time and really make your shoulders burn. Don’t be afraid to take breaks, as this can be more strenuous than you think.
The popcorn should come off very easily. If it doesn’t, you need to add more water. You may need to use a scrapper with an extension pole if your ceiling is particularly high up.
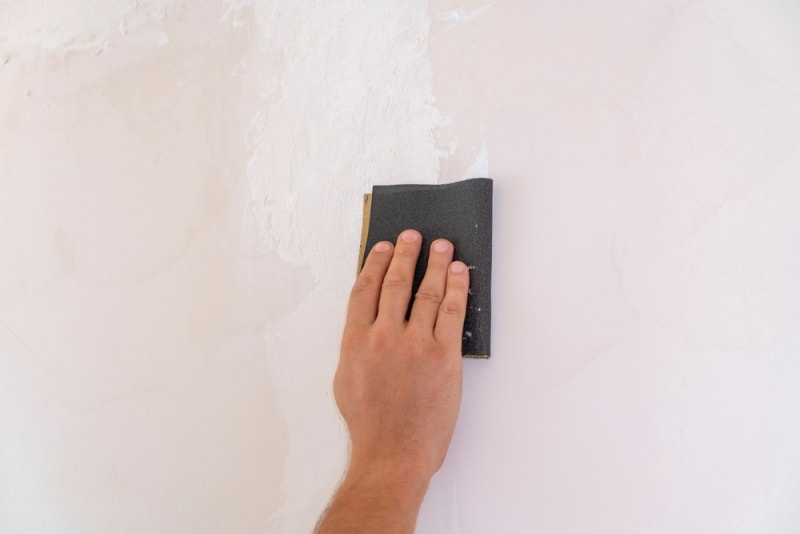
6. Sand the Ceiling
Once all of the popcorn is off, it is time to sand the ceiling to remove any last pieces. You’ll need to use a sanding pole for this purpose since you need to reach all the way to the ceiling.
Be sure to be thorough on this step, even if you’re really just aching to be done at this point. Leaving any amount of popcorn on the ceiling can make future ceiling finishings difficult, if not impossible.
7. Finish the Ceiling
Now that the popcorn has been removed from the ceiling, we highly recommend that you finish it with something else. Often, the original builder only did a very crude job on the drywall under the popcorn since you originally couldn’t see it anyway. Many people have to fix the drywall underneath the popcorn when they are done removing it, so be prepared.
You should do a skim coat after all drywall repairs have been made. This coat simply helps you finish off your ceiling and make the job look professional.
You can always add a different texture too—there are lots of finishes out there that are popular— and you can also paint your ceiling, which is becoming more and more trendy.

In Conclusion
Removing a popcorn ceiling is probably more involved than most people think. There is a lot that goes into this process. You will be scraping the popcorn off your ceiling for quite a while, so be prepared for the time commitment before you start.
It’ll probably take days to remove the popcorn, given the shoulder exercise that you’ll get. It can be very hard work despite how it may seem, so plan accordingly.
However, in the end, you do get a nice, clean ceiling, which is completely worth it. Removing the popcorn isn’t all that complicated. It’s just the sheer amount of work that goes into the project that can make it a bit overwhelming.
Luckily, you can simply follow our steps to make the process as pain-free as possible.
Featured Image Credit: NC_1, Shutterstock
Contents
