

Peel and stick tiles offer an effective and affordable way of updating the look of your home without the expense and mess of a complete remodel. You can maintain the old tiles and apply a backslash of peel and stick tiles to give your ceramic tiles, glass tiles, and wall linoleum, among other surfaces, a proper facelift.
So, can you peel and stick tile over tile? Absolutely!
If the old tiles are smooth, no extra preparation is necessary. Just give your wall a good scrub and install the peel-and-stick tiles on your bathroom vanity, laundry room, or kitchen backsplash. These easy-to-clean vinyl tiles are water, heat, and stain resistant, not to mention that they can last for 5 to 25 years, depending on the installation area.
Read on to learn the precise requirements of installing peel and stick tiles over your existing tiles. We will explore the best tricks and tips to give your spaces beautiful wall accents.

What Are Peel and Stick Tiles?
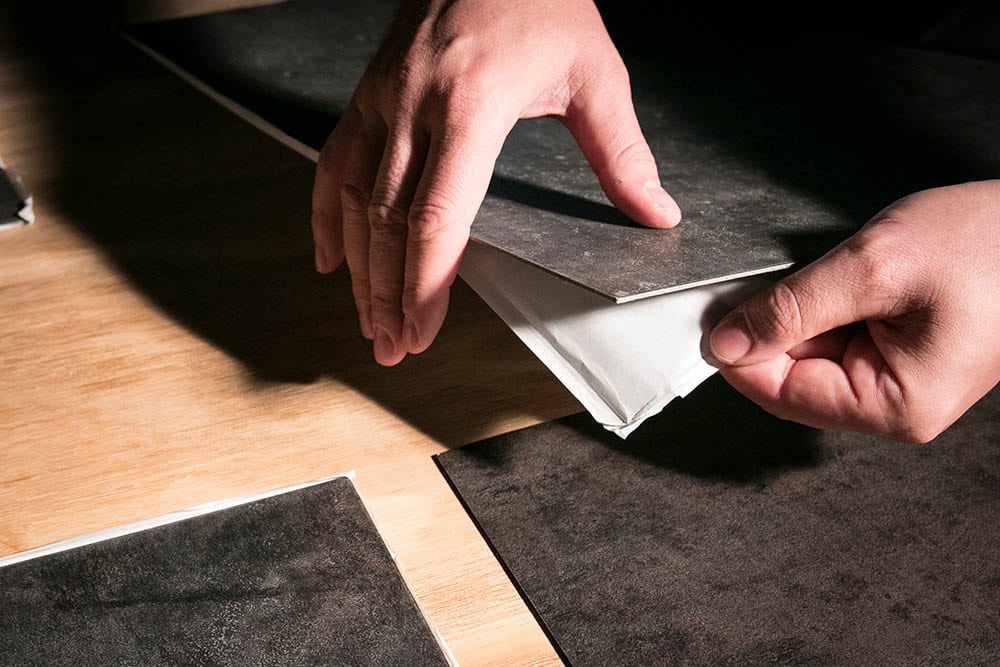
Peel and stick or self-adhesive tiles are stylish, affordable tiles made from a thin, layered material. While they don’t have the thickness of regular tiles¹, they offer the same qualities and aesthetic appeal and can be fitted on walls, floors, or backsplashes. Because they feature an adhesive on the back, you merely need to peel and stick them on your predetermined surfaces.
Peel and stick tiles are a great option if you are on a budget and want to revamp your home. They are also a top choice for those seeking to give their rental apartments a facelift without having to replace the existing surfaces.
What Are They Made From?
Peel and stick tiles feature multiple layers of vinyl. They are flexible yet durable and come in various patterns and colors. You can also find peel and stick tiles designed to resemble natural materials like wood or stone. The most expensive peel and stick tiles are made from metal clad, glass or ceramic.
Cost of Peel and Stick Tiles
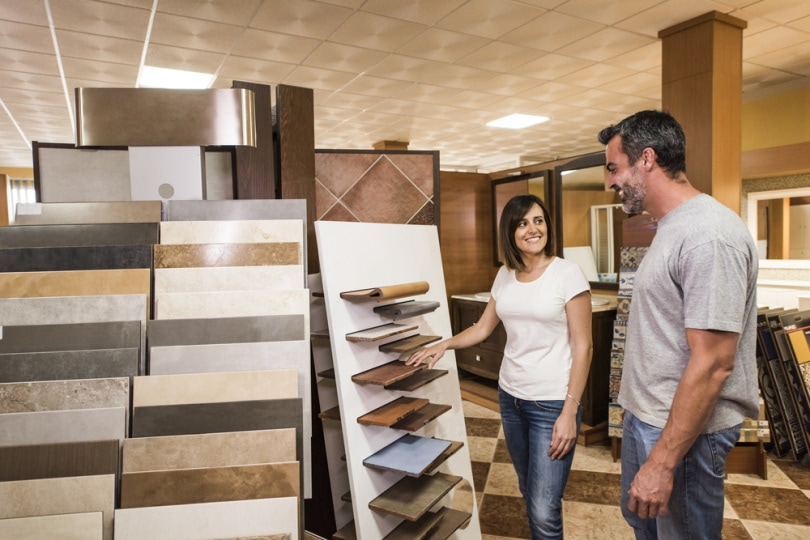
Peel and stick tiles come in various patterns, textures, and quality. The type of tile you choose will play a significant role in dictating the cost. For instance, you can expect to pay more when investing in waterproof stick and peel tiles or on varieties designed to resemble natural materials like wood and stone.
These tiles cost between $1 and $1.50 per square foot.
How to Maintain Peel and Stick Tiles
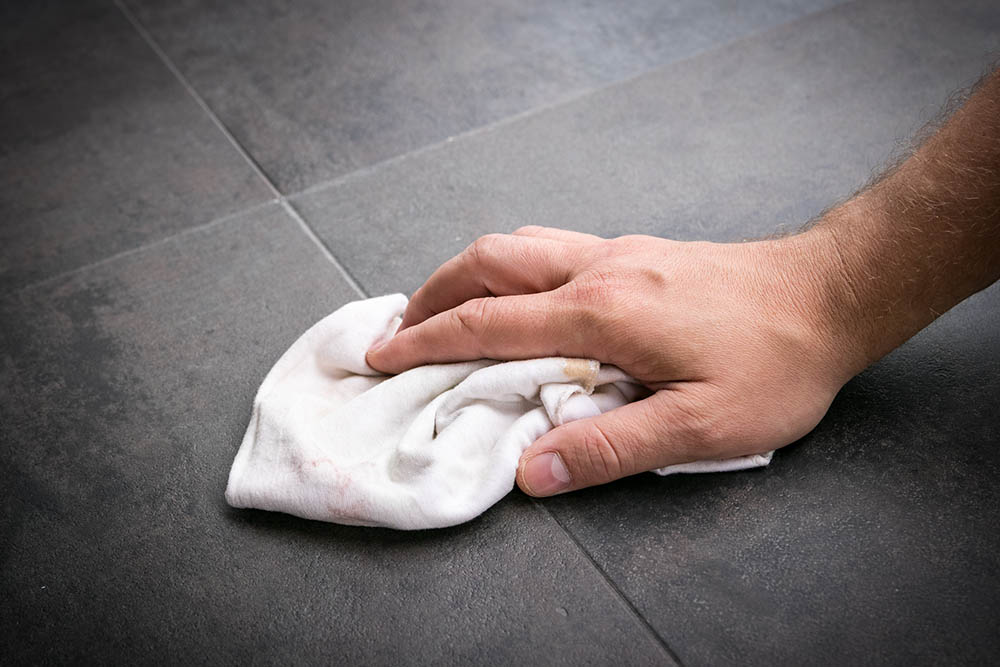
Most peel and stick tiles, especially top-quality varieties, are moisture resistant and can be installed in highly humid areas. They require minimal maintenance even when installed in high-moisture areas. You can clean them with regular tile cleaning products or wipe them down whenever necessary.
How Durable Are Peel and Stick Tiles?
Various factors will play a leading role in determining the longevity of your peel and stick tiles. These factors include the quality of the tiles and whether they are installed in a moisture-prone location. On average, the tiles can last for five years or more.
Opting for a cheap fix is perfectly okay if you are only searching for temporary solutions. However, if you intend to keep your peel and stick tiles for years, choosing the best quality you can find is worth it.
Moreover, you can extend the durability of tiles installed in moisture-prone areas by adding an extra layer of tile-specific adhesive during installs. Note that this may also mean more work when it’s time to remove your peel and stick tiles.
Is a Peel and Stick Backsplash Over Tiles Worth It?
Peel and stick tiles offer a quick, affordable, and easy way to update the looks of your living spaces. The tiles come in various patterns, styles, and colors and adhere well to many surfaces, including existing tiles and linoleum. They resemble actual tiles, so you don’t have to worry about your spaces looking like a tacky interior design nightmare.
Peel and stick tiles can be made from different materials. Even though most are made from vinyl, some designs are made from lightweight metal, stone, glass, or a 3D gel material. Here is a list of their benefits and drawbacks to help you weigh whether they are worth it.
- Available in a range of colors, patterns, and textures
- Adhere well to existing tiles, drywall, concrete, linoleum, etc.
- Water and heat resistant
- Easy to clean and maintain
- Quite affordable compared to other alternatives
- Easy and messy –free installation
- Top-quality peel and stick tiles are expensive
- Not ideal for use in showers
- You must have flawless underlayment
- Not recycle-friendly
Specific Requirements for Installing Peel and Stick Tiles Over Tiles
Even DIY beginners can install peel-and-stick tiles in just a few hours. Their main perk is that they save you from the time commitment and mess allied with removing old, outdated tiles. If you want to bring your bathroom vanity, kitchen, or laundry area into the decade, here are the simple steps to take.
1. Preparation
The rule of thumb when installing peel and stick tiles is that you need flat surfaces. It would be best if you fixed any broken, loose, or cracked ceramic tiles to avoid “lippage” in the ultimate look of your finished surfaces. Remove the damaged tiles and replace them, or fill the space with a concrete-based motor.
If your surfaces are in a pristine state, clean them to remove dust, dirt, and oils that can hinder proper adhesion. Once the surface is dry, you can begin peel-and-stick tile installs.
2. Take Measurements of Your Space
If your goal is to achieve clean, professional-looking walls, it is crucial first to take the measurements of your space. Start by drawing reference lines marking the borders of the stick and peel tile wall. The idea is to ensure you align the tiles accordingly and cut precise lengths and widths of areas where whole tiles cannot fit.
Use a sharp tool like a sharp pair of scissors to make clean cuts of the vinyl peel and stick tiles. If you invest in tiles made from ceramic, metal clad or glass, you can cut them if necessary using a wet saw or an angle grinder with a diamond cutting wheel.
3. Peel and Stick!
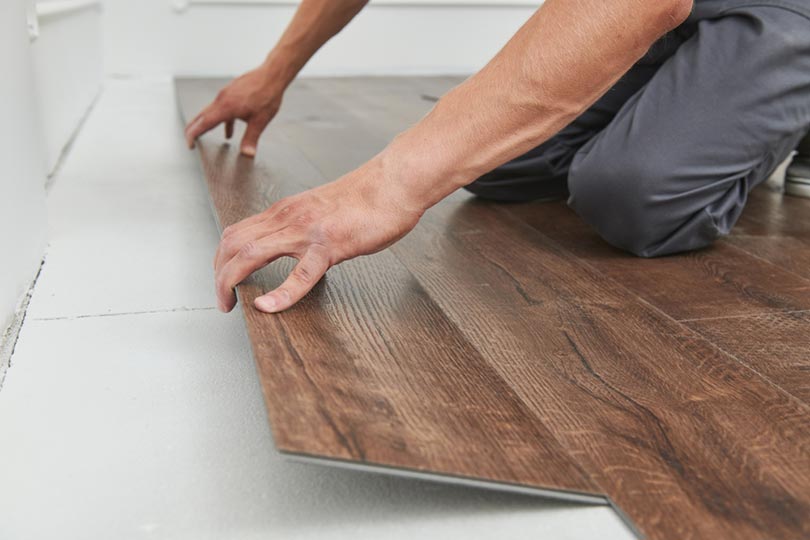
The next step is to peel off the backings and stick your tiles on the surface. Refer to the reference lines and start by installing a tile on the topmost corner. Begin by installing whole tiles and install the cut tiles last.
Throughout the installs, occasionally step back to confirm your tiles are well-aligned. We also recommend using a rolling pin to press the tiles against the wall. The pressure will make them adhere better.
How to Remove Peel and Stick Tiles
Peel and stick tiles appeal to many because they are easy to install, and removing them is equally straightforward. Again, you don’t necessarily have to hire a professional and can do a DIY project.
1. Apply Heat
Even though the back of peel and stick tiles has a strong adhesive, you can soften it by applying heat. Use a hairdryer or heat gun to warm one tile at a time. You can also use an iron if you don’t have either of these appliances. Place a medium-weight towel between the iron and the tile you want to remove.
It takes roughly one minute to soften the adhesive enough to remove a tile easily.
2. Remove a Tile at a Time
Lift one corner of the warmed tile, place a chisel underneath it, and gently raise the rest of the tile. Dispose of the removed tiles in a plastic trash bag to prevent the warm adhesive from sticking on other surfaces.
3. Remove Adhesive From the Surface
If you are planning a move and have to leave your old apartment in pristine condition, removing every scrap of adhesive from the surfaces is necessary. However, if you want to cover your backsplash with a new peel-and-stick tile design, you merely need to ensure the surface is reasonably smooth and level.
A light sanding could do the trick, depending on the amount of glue you are dealing with. Alternatively, use a scraper tool or a glue remover if you applied more adhesive to make your peel-and-stick tiles adhere better. As long as the subfloor was in a sound state before installing the tiles, it should be in equally good shape once you remove them.
Final Thoughts
Even homes with futuristic interior design may need an update from time to time. If you have a modest budget and would rather avoid investing in a complete remodel, peel and stick tiles offer a fantastic alternative. You can give different spaces a quick fix by installing these smart tiles over existing tiles.
To ensure your project is successful, don’t forget to buy slightly more tiles than you need. It’s common to encounter adhesion problems, a few failed cutting attempts, and so on. You can always use any leftovers in the future to repair peeling areas.
Related Reads:
Featured Image Credit: Benjamin Clapp, Shutterstock
Contents
